The Altar Manifest

It's been some time since I've written. I'm on the cusp of second degree initiation but there's a pretty significant roadblock. The OTA is a ceremonial outfit and therefore requires more than my usual ritual setup. For the longest time, I've been laying out an altar cloth and lighting some candles on my coffee table before settling in for my exercises but that won't work anymore. I'm at a point where in order to continue on my path I need to have a temple setup. The road I'm on is a road of discovery and recovery. Every step I've taken in life has been leading up to this and I need to see it through for my own benefit and for the people that I love. I sometimes forget that I was once subjected to true cruelty that ended up causing the people in my life to suffer as collateral damage and that's not fair. God has some explaining to do and only through perfection of spirit am I going to get back to that place where I can finally ask God why. The only way that's going to happen is if I take the initiative and follow through, even when that means stretching my abilities and crafting these ritual tools out of wood and hardware.
I'm not a handy guy. If anything, this experiment has been a stark reminder of how handy I am not but it's been fun and enlightening. The build is a true metaphor for the power of creation that we Gnostics chase hard. I took an idea, nothing more than information, and gave it form with my own Will and two hands. Sometimes I'd just admire it, having a hard time believing that I'd actually built the damn thing! It turned out so much better than I thought it would and I'm shocked that I was able to pull this off. There's a real magical benefit to putting that sort of energy into your temple tools.
So how did it all come together?
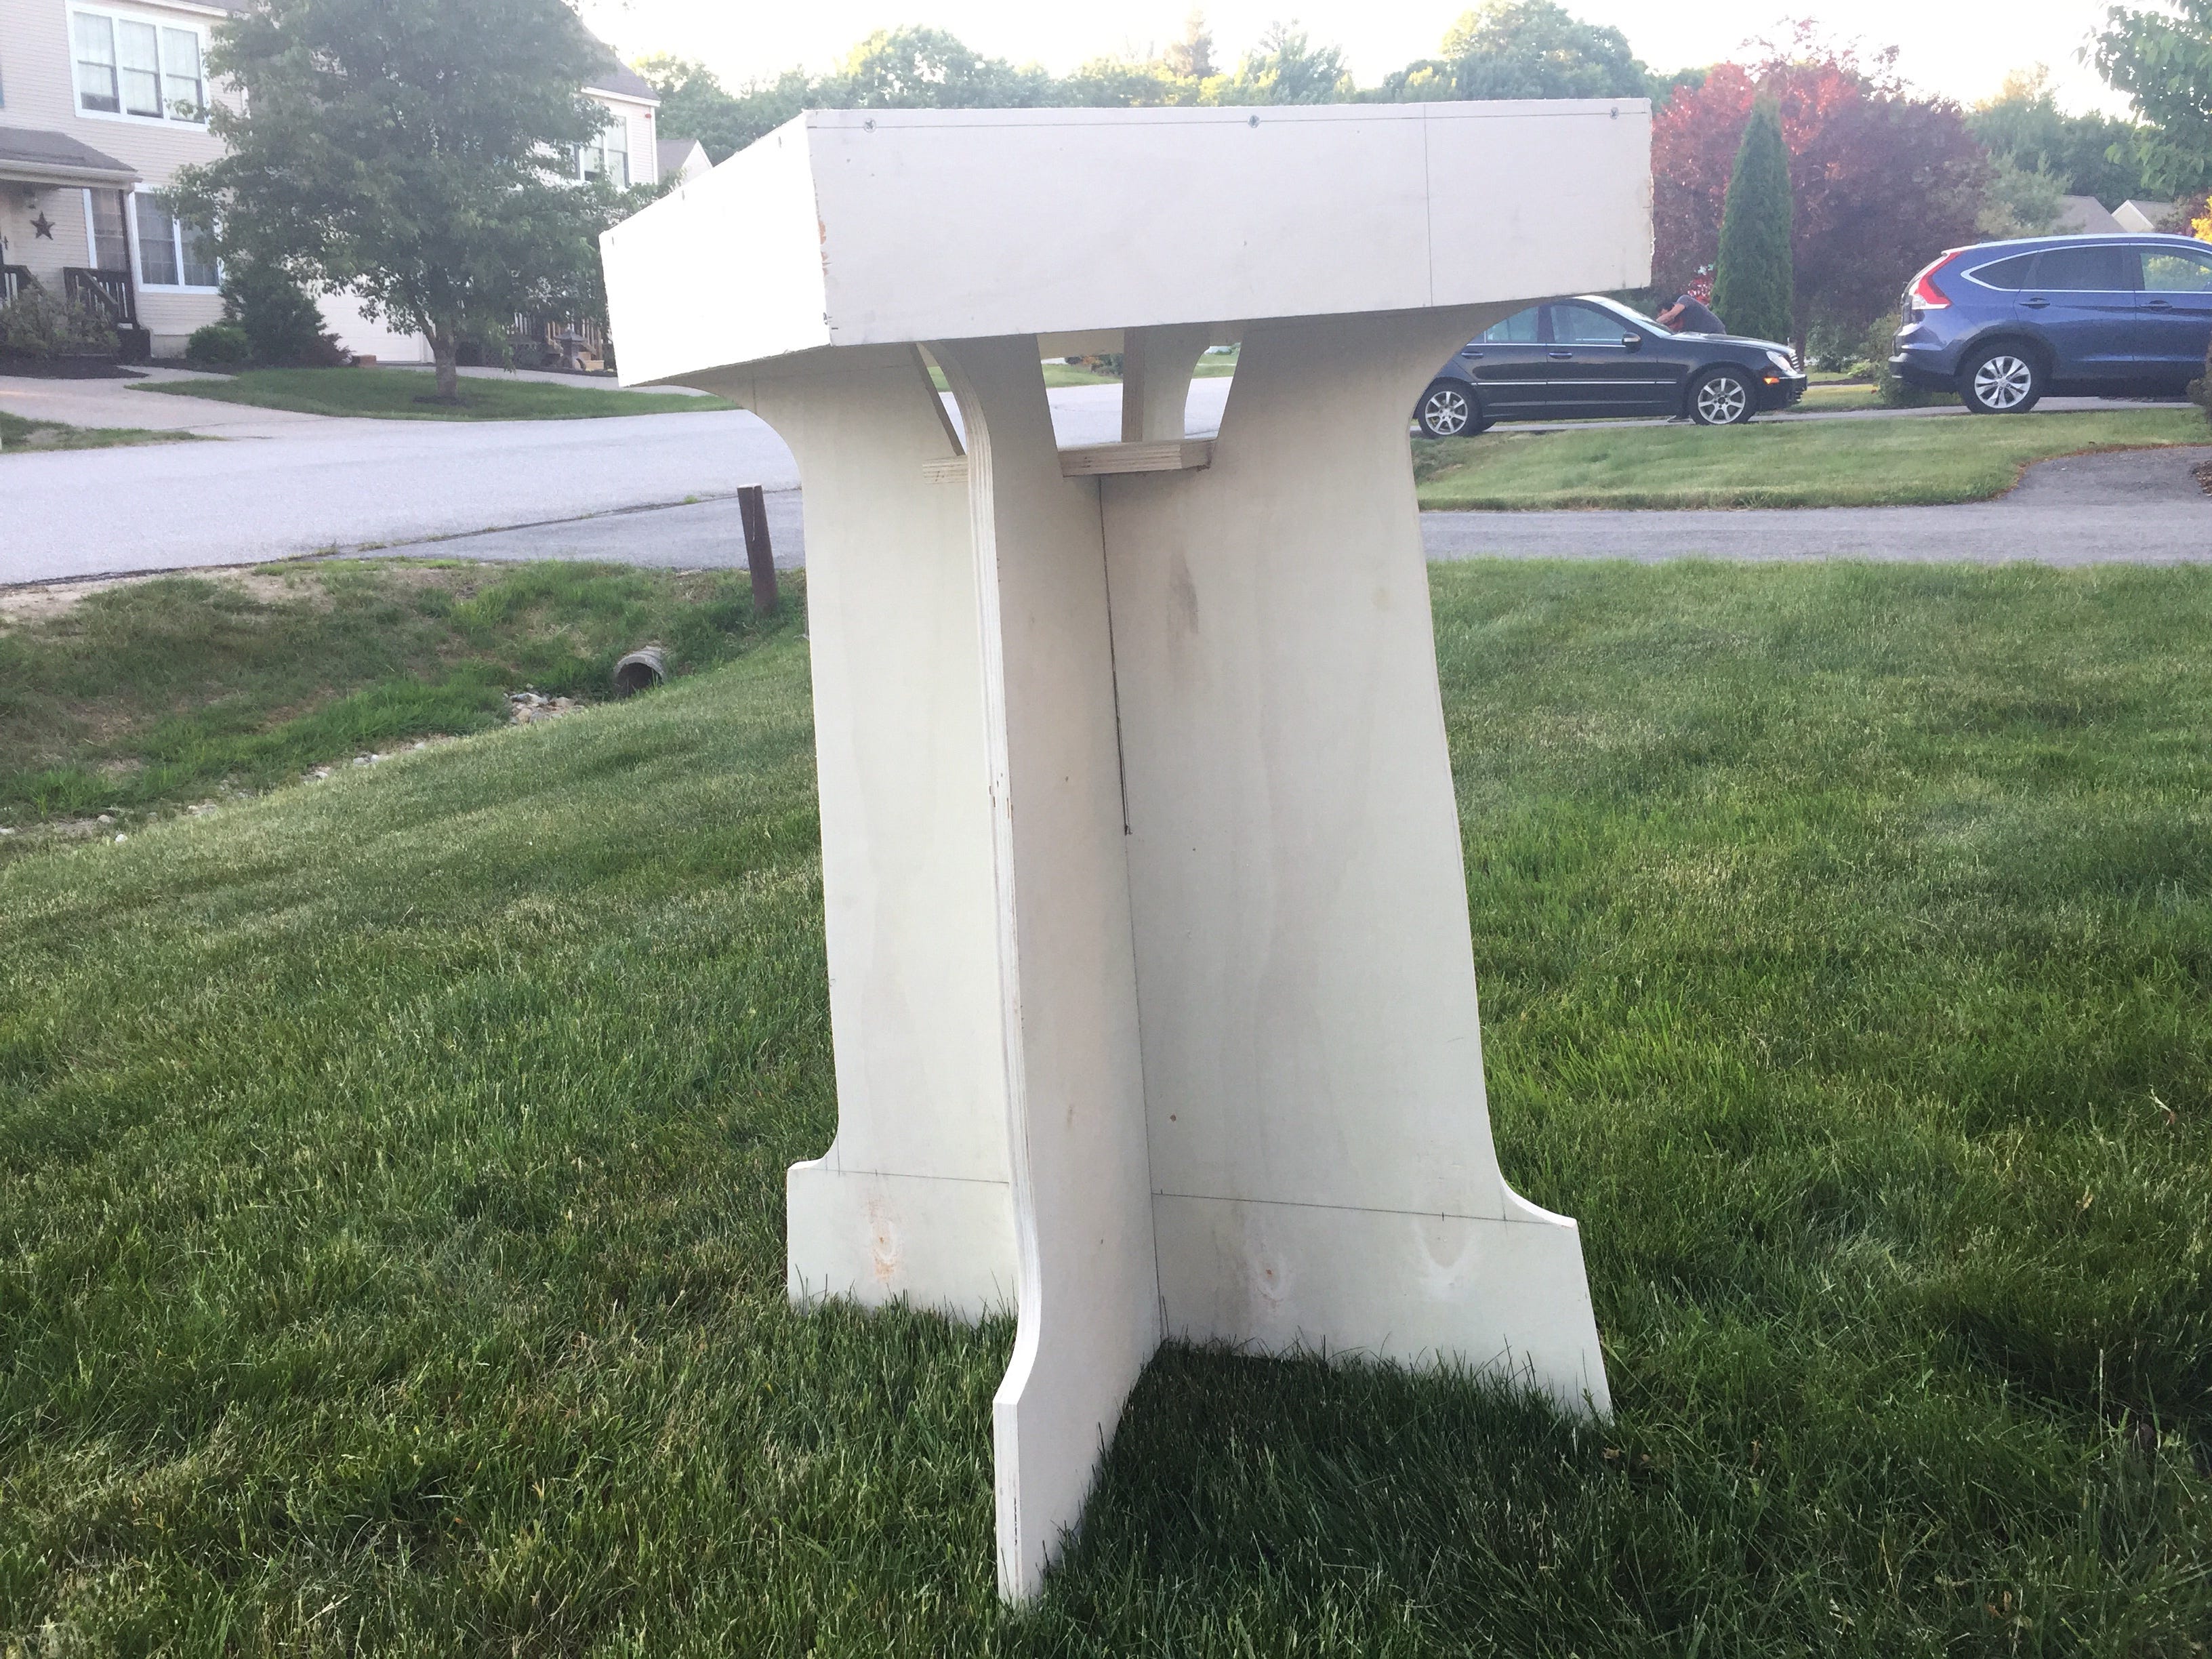
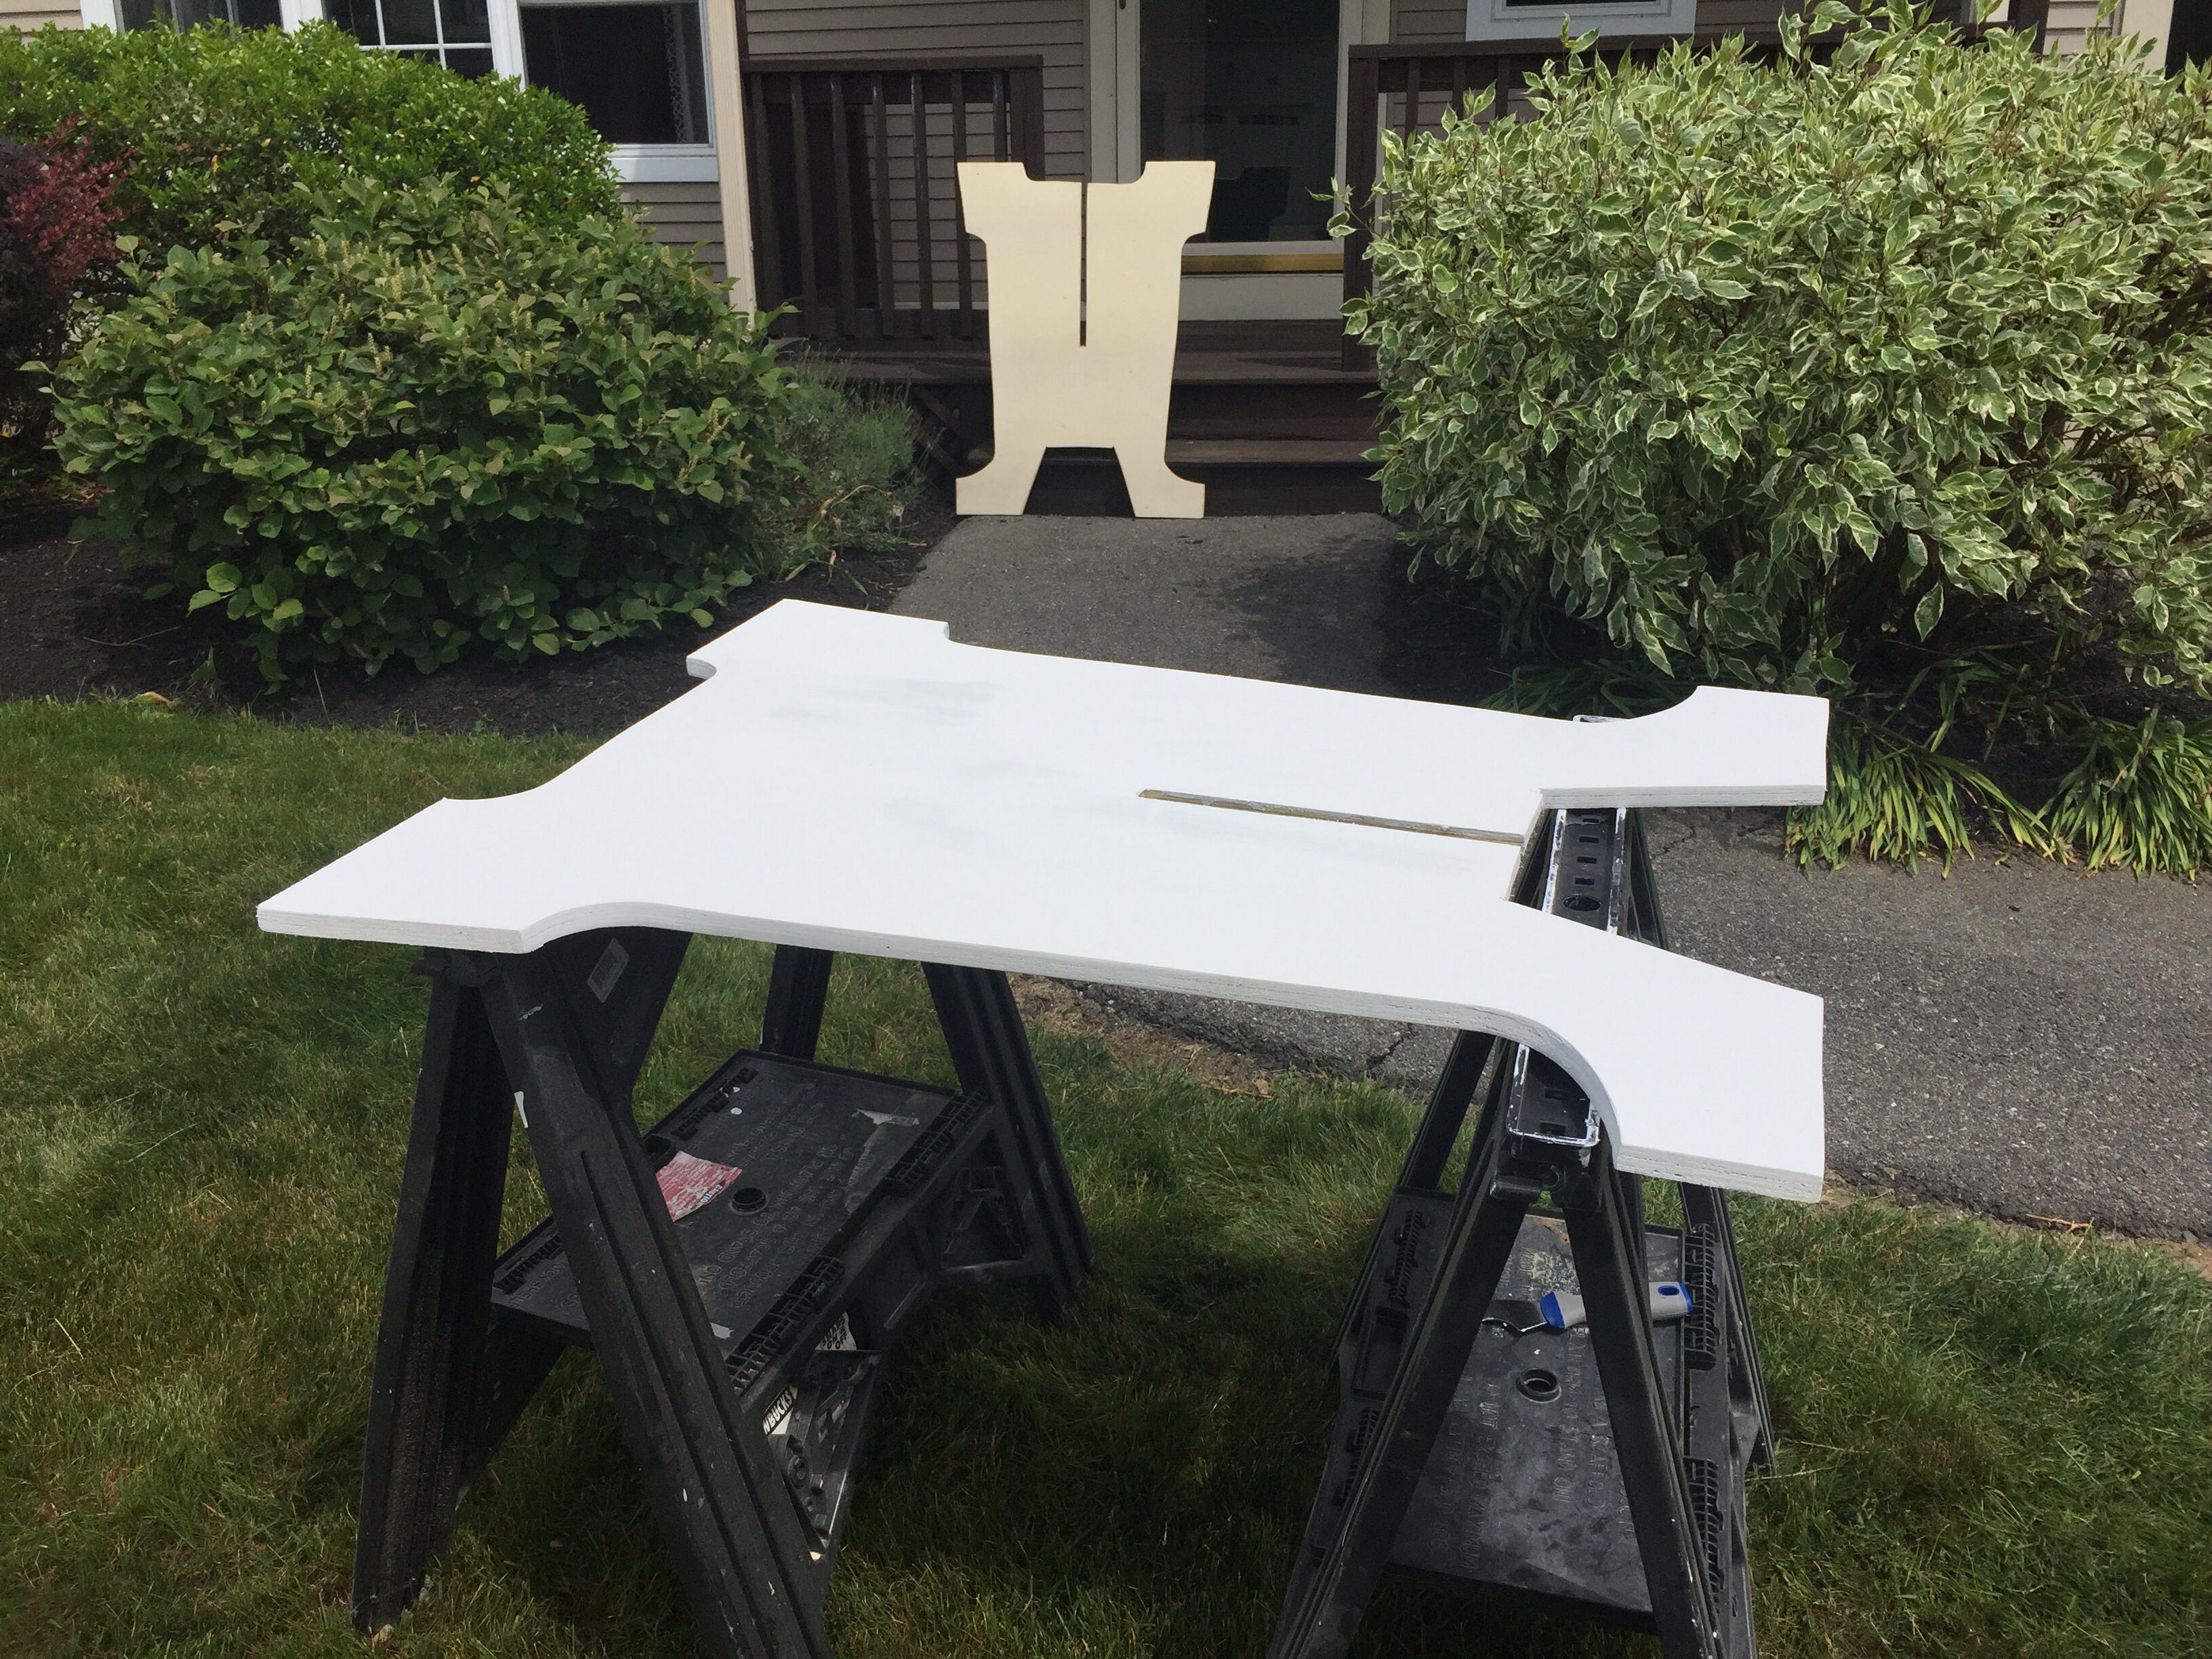
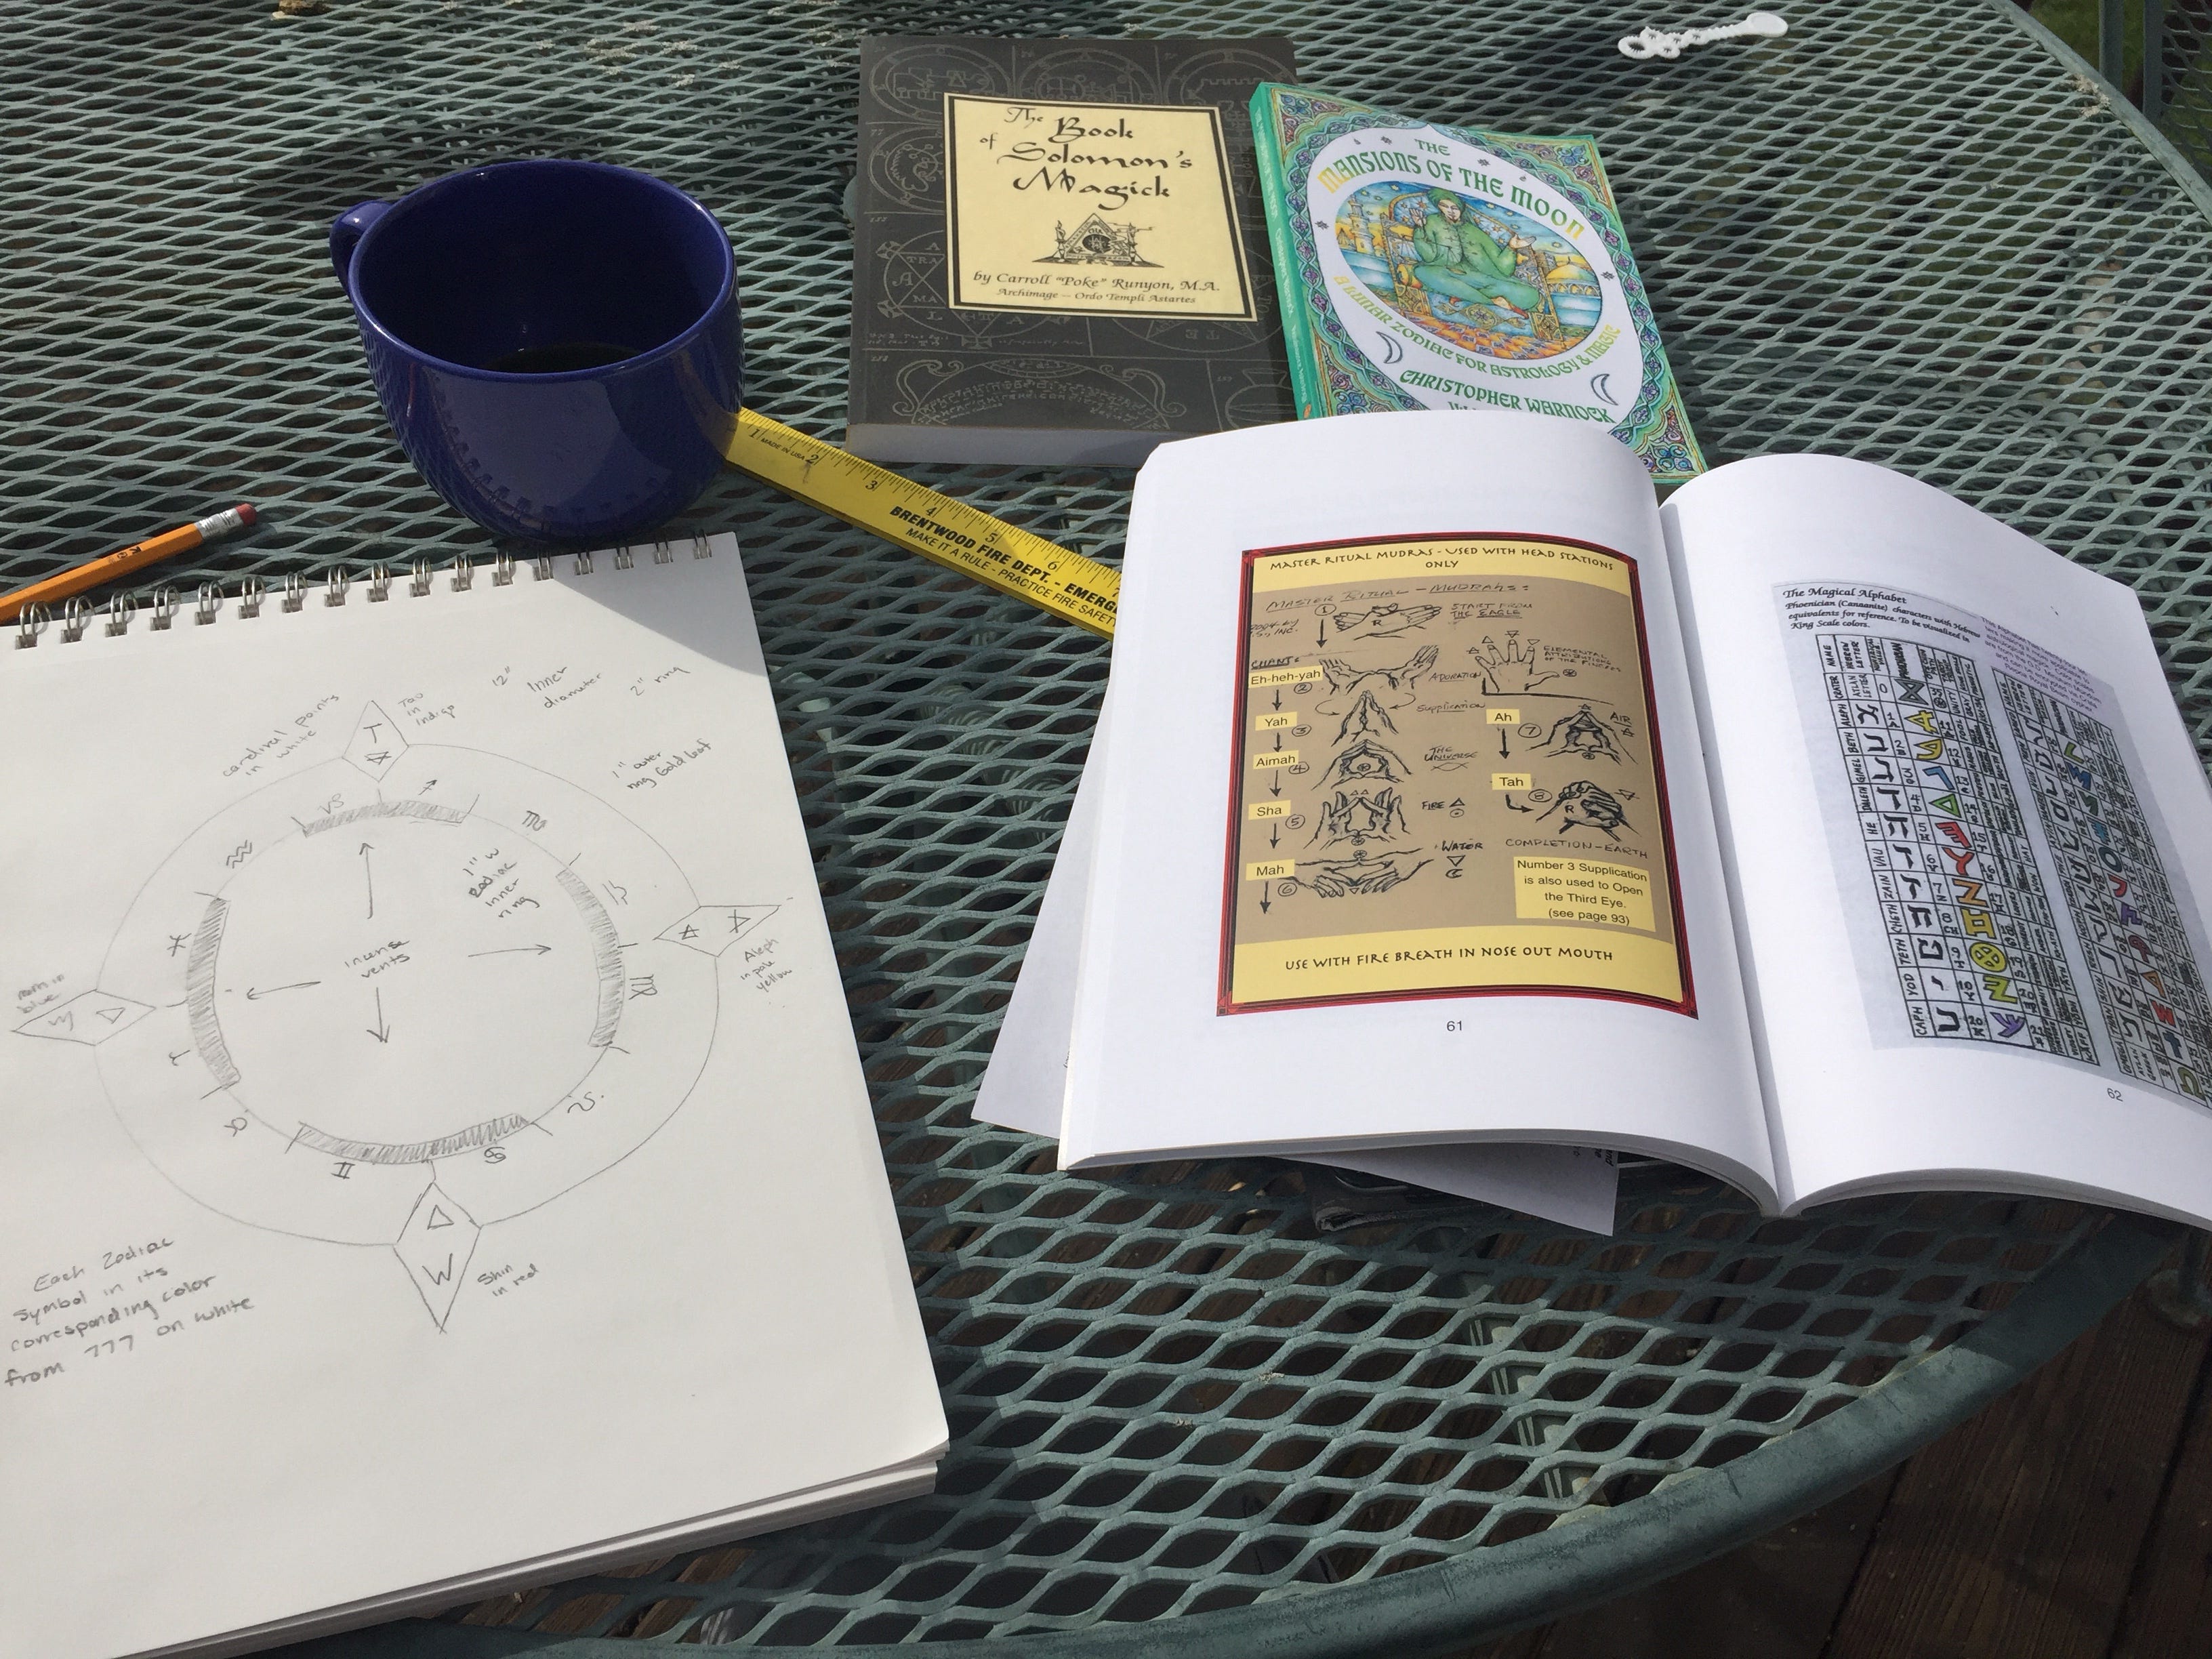
You can get the plans for the OTA altar from Poke Runyon's books as well as the OTA associate members site. There are two versions. There's the classic double-cube altar, which is pretty standard for Golden Dawn current traditions. It's symbolic of the macrocosm/microcosm connection but isn't terribly practical for outfits like ours that tend to move theirs around for indoor/outdoor operations. To solve this problem, Poke came up with a crossed double slat design that is much easier to build. I opted for this design.
I started with a 3/4" sheet of blonde poplar plywood. It was significantly more expensive that the usual stuff that you might use when building a house or whatever but I wanted something sturdy, with a smooth texture and I wanted it to carry an energy with it that reflected the care and consideration that I put into it. This wouldn't be a perfect build, but I intended to do the best I could to make something that I could both be proud of as well as perform important rituals on.

I measured the hell out of it and did the best I could to recreate the plans in the OTA docs. I borrowed some tools from my brother in law and then some more and then some more as the build progressed. Then I cut the shape out with a jigsaw.
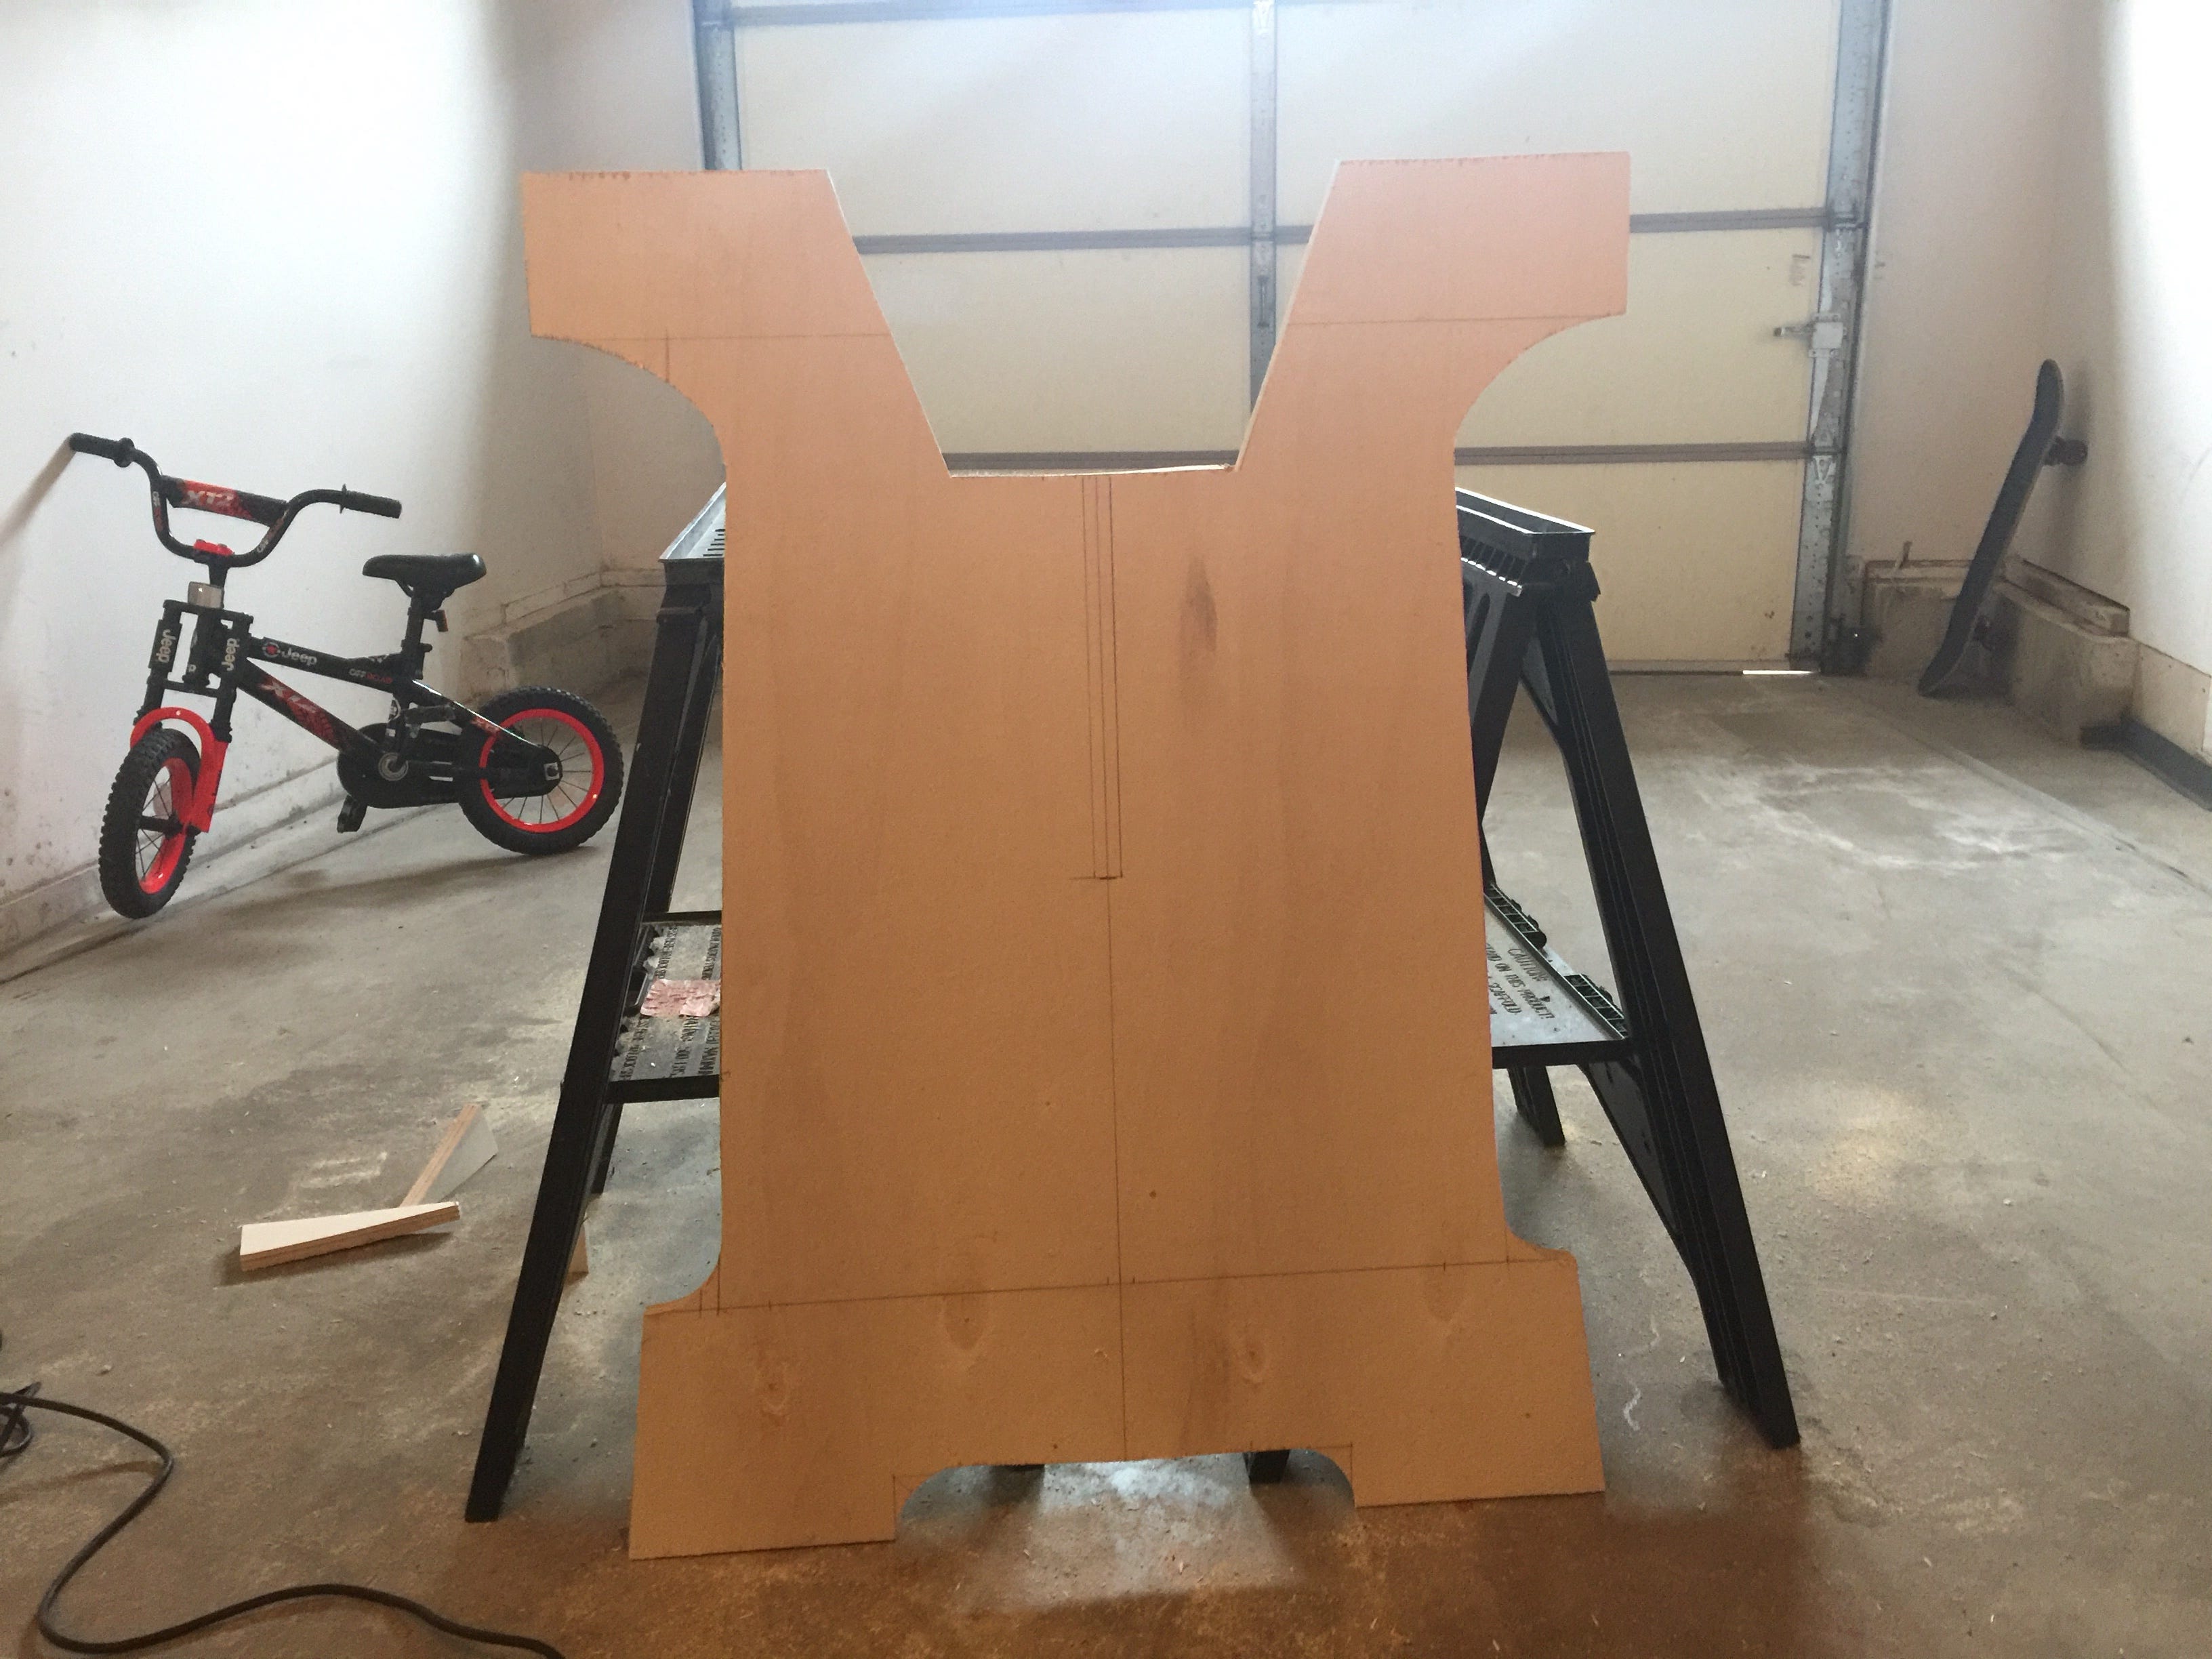
I'd never used a jigsaw before but I got the general idea and watched some videos on YouTube. The saw I borrowed had a bunch of blades and I used the wrong one. There were blades with finer teeth that could handle curves and arcs better than the the blade I chose, which splintered the shit out of the edges of the cut. Nothing some sanding wouldn't fix but I'd learn this for later. In the end, I had two nearly identical pieces. The first came out better than the second as the latter piece was a bit rushed and some the straight lines bowed outward. I'd sand them down to make them straighter later on.
The two pieces fit together reasonably well, though. The slots that join the two pieces are a little tight. Next up was the altar top and I definitely needed more tools.
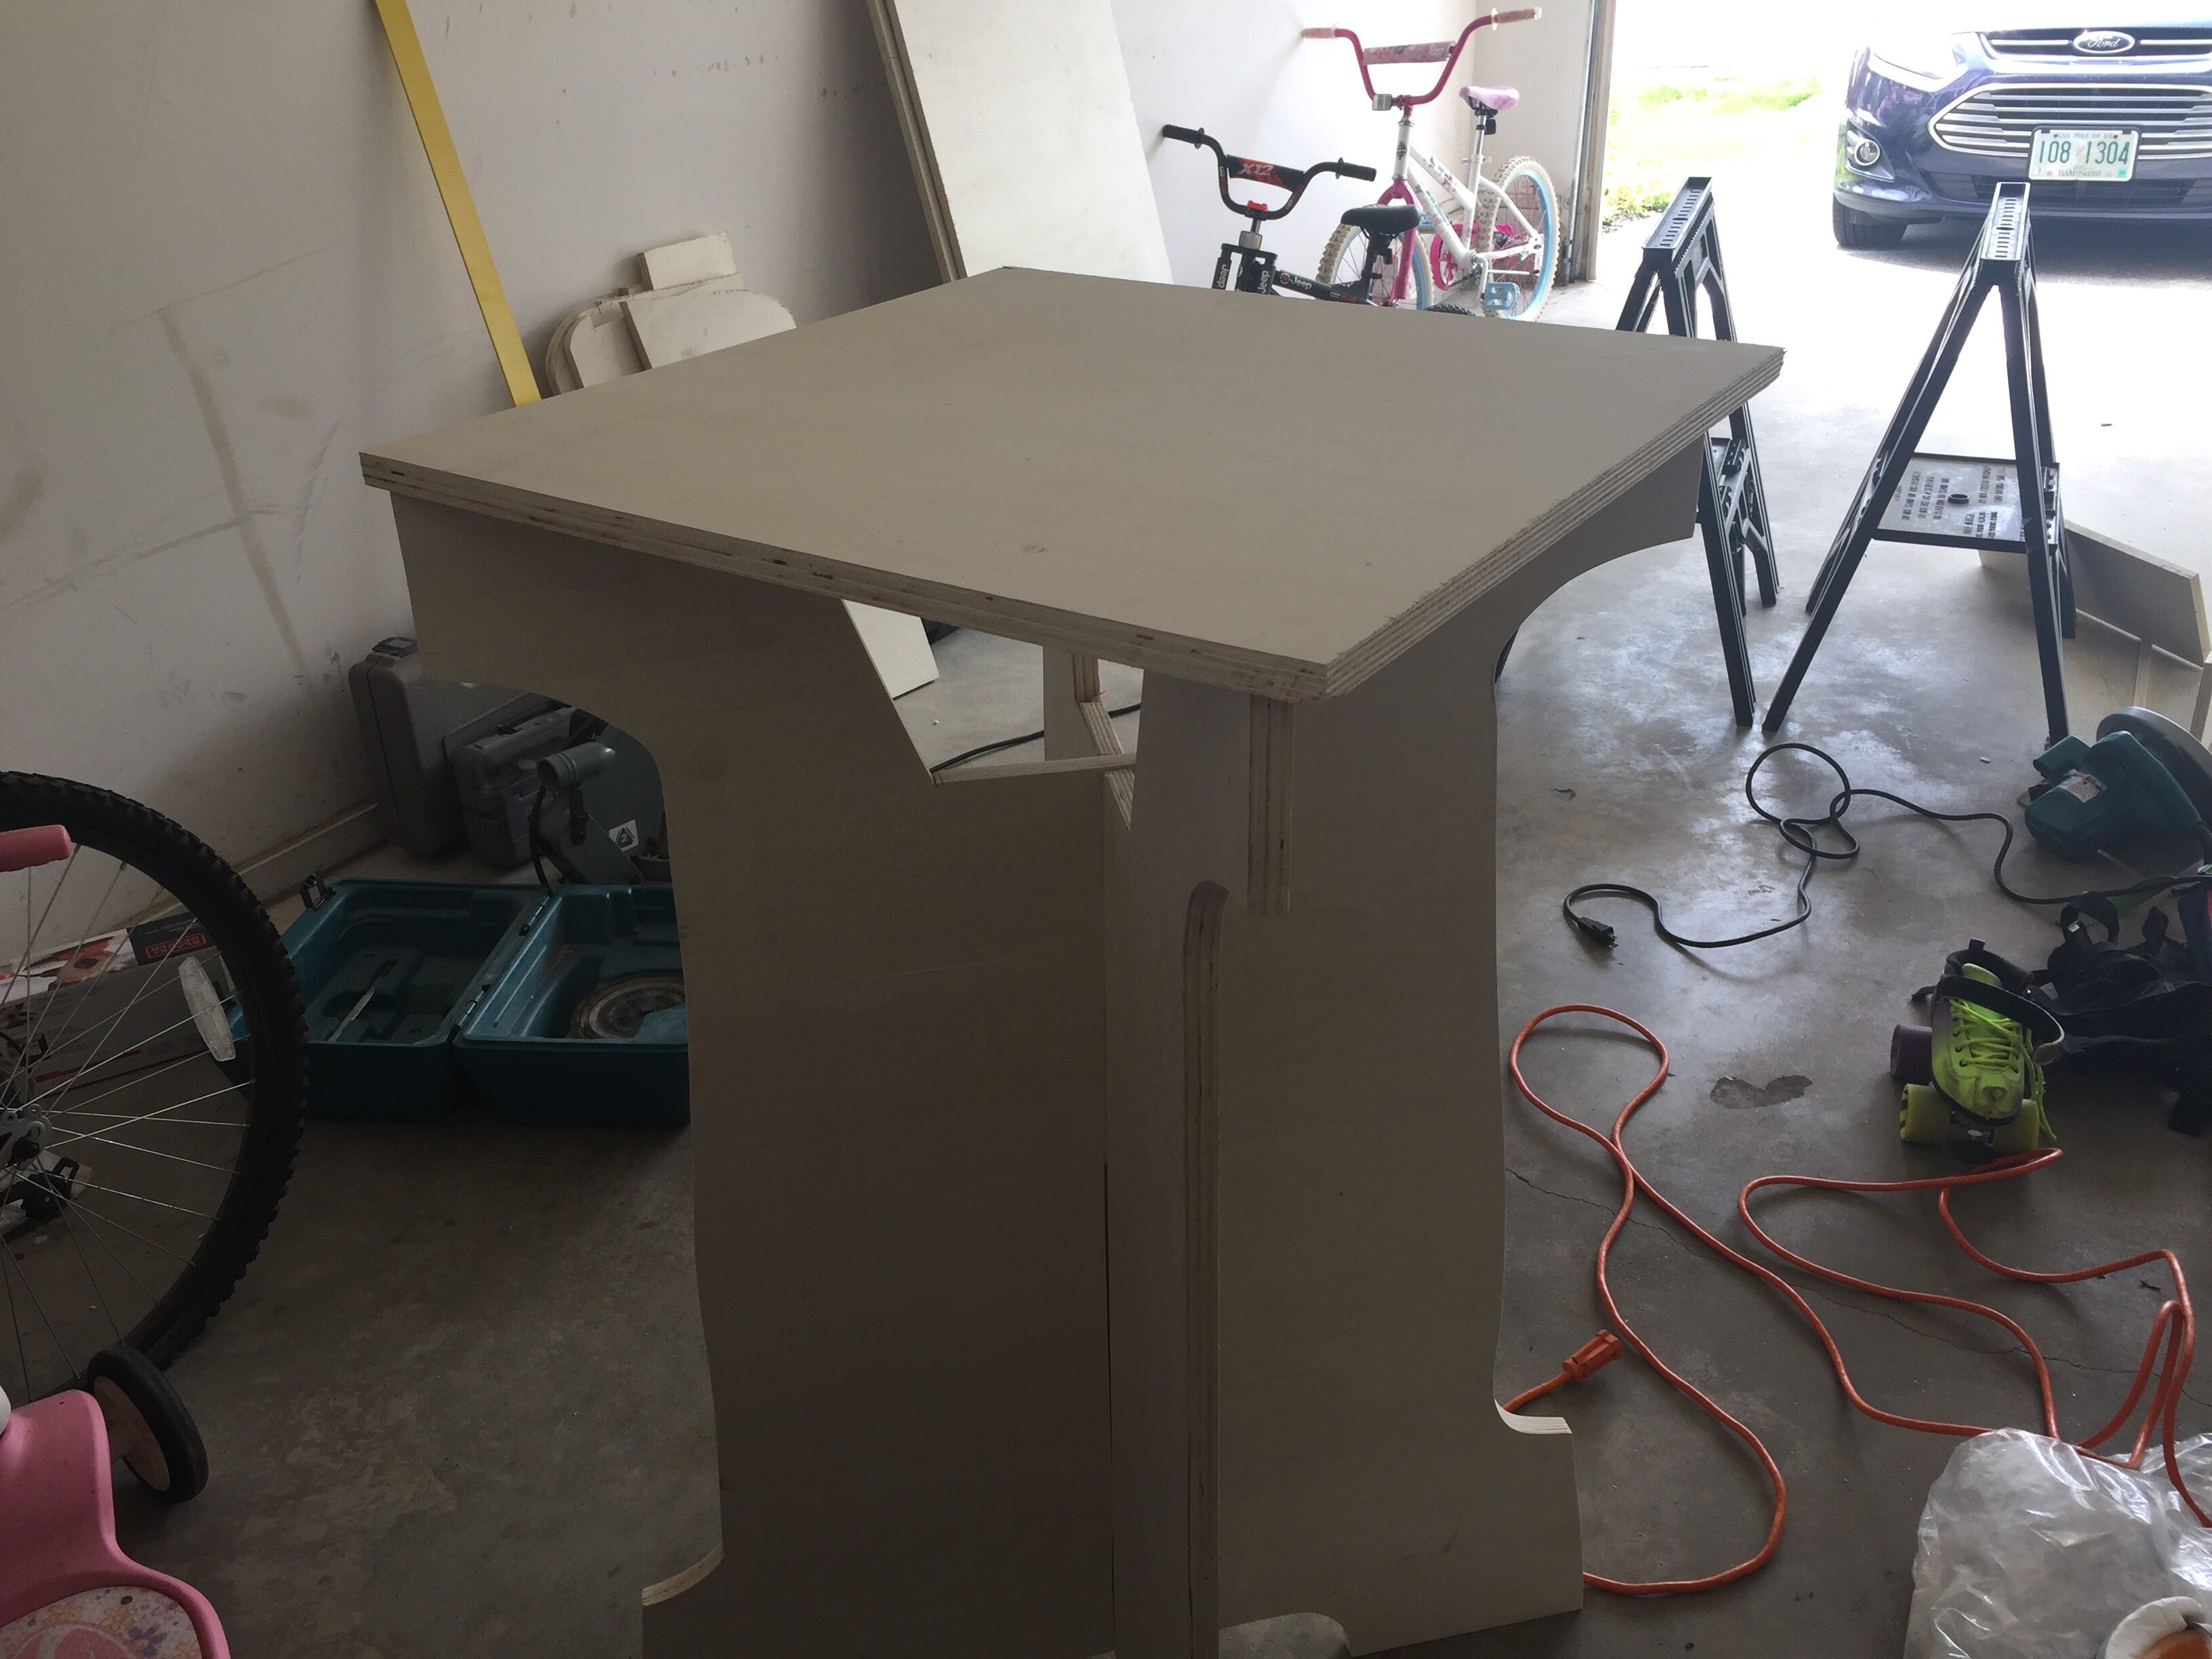
I bought another sheet of plywood and got to cutting. Ideally, I should have had a table saw with a blade that I could tilt for this step but that sort of thing just wasn't available to me. I had a chop saw and a circular saw that you could tilt in order to cut 45 degree angles for frames such as the sort of thing I was building, and it would have to do.
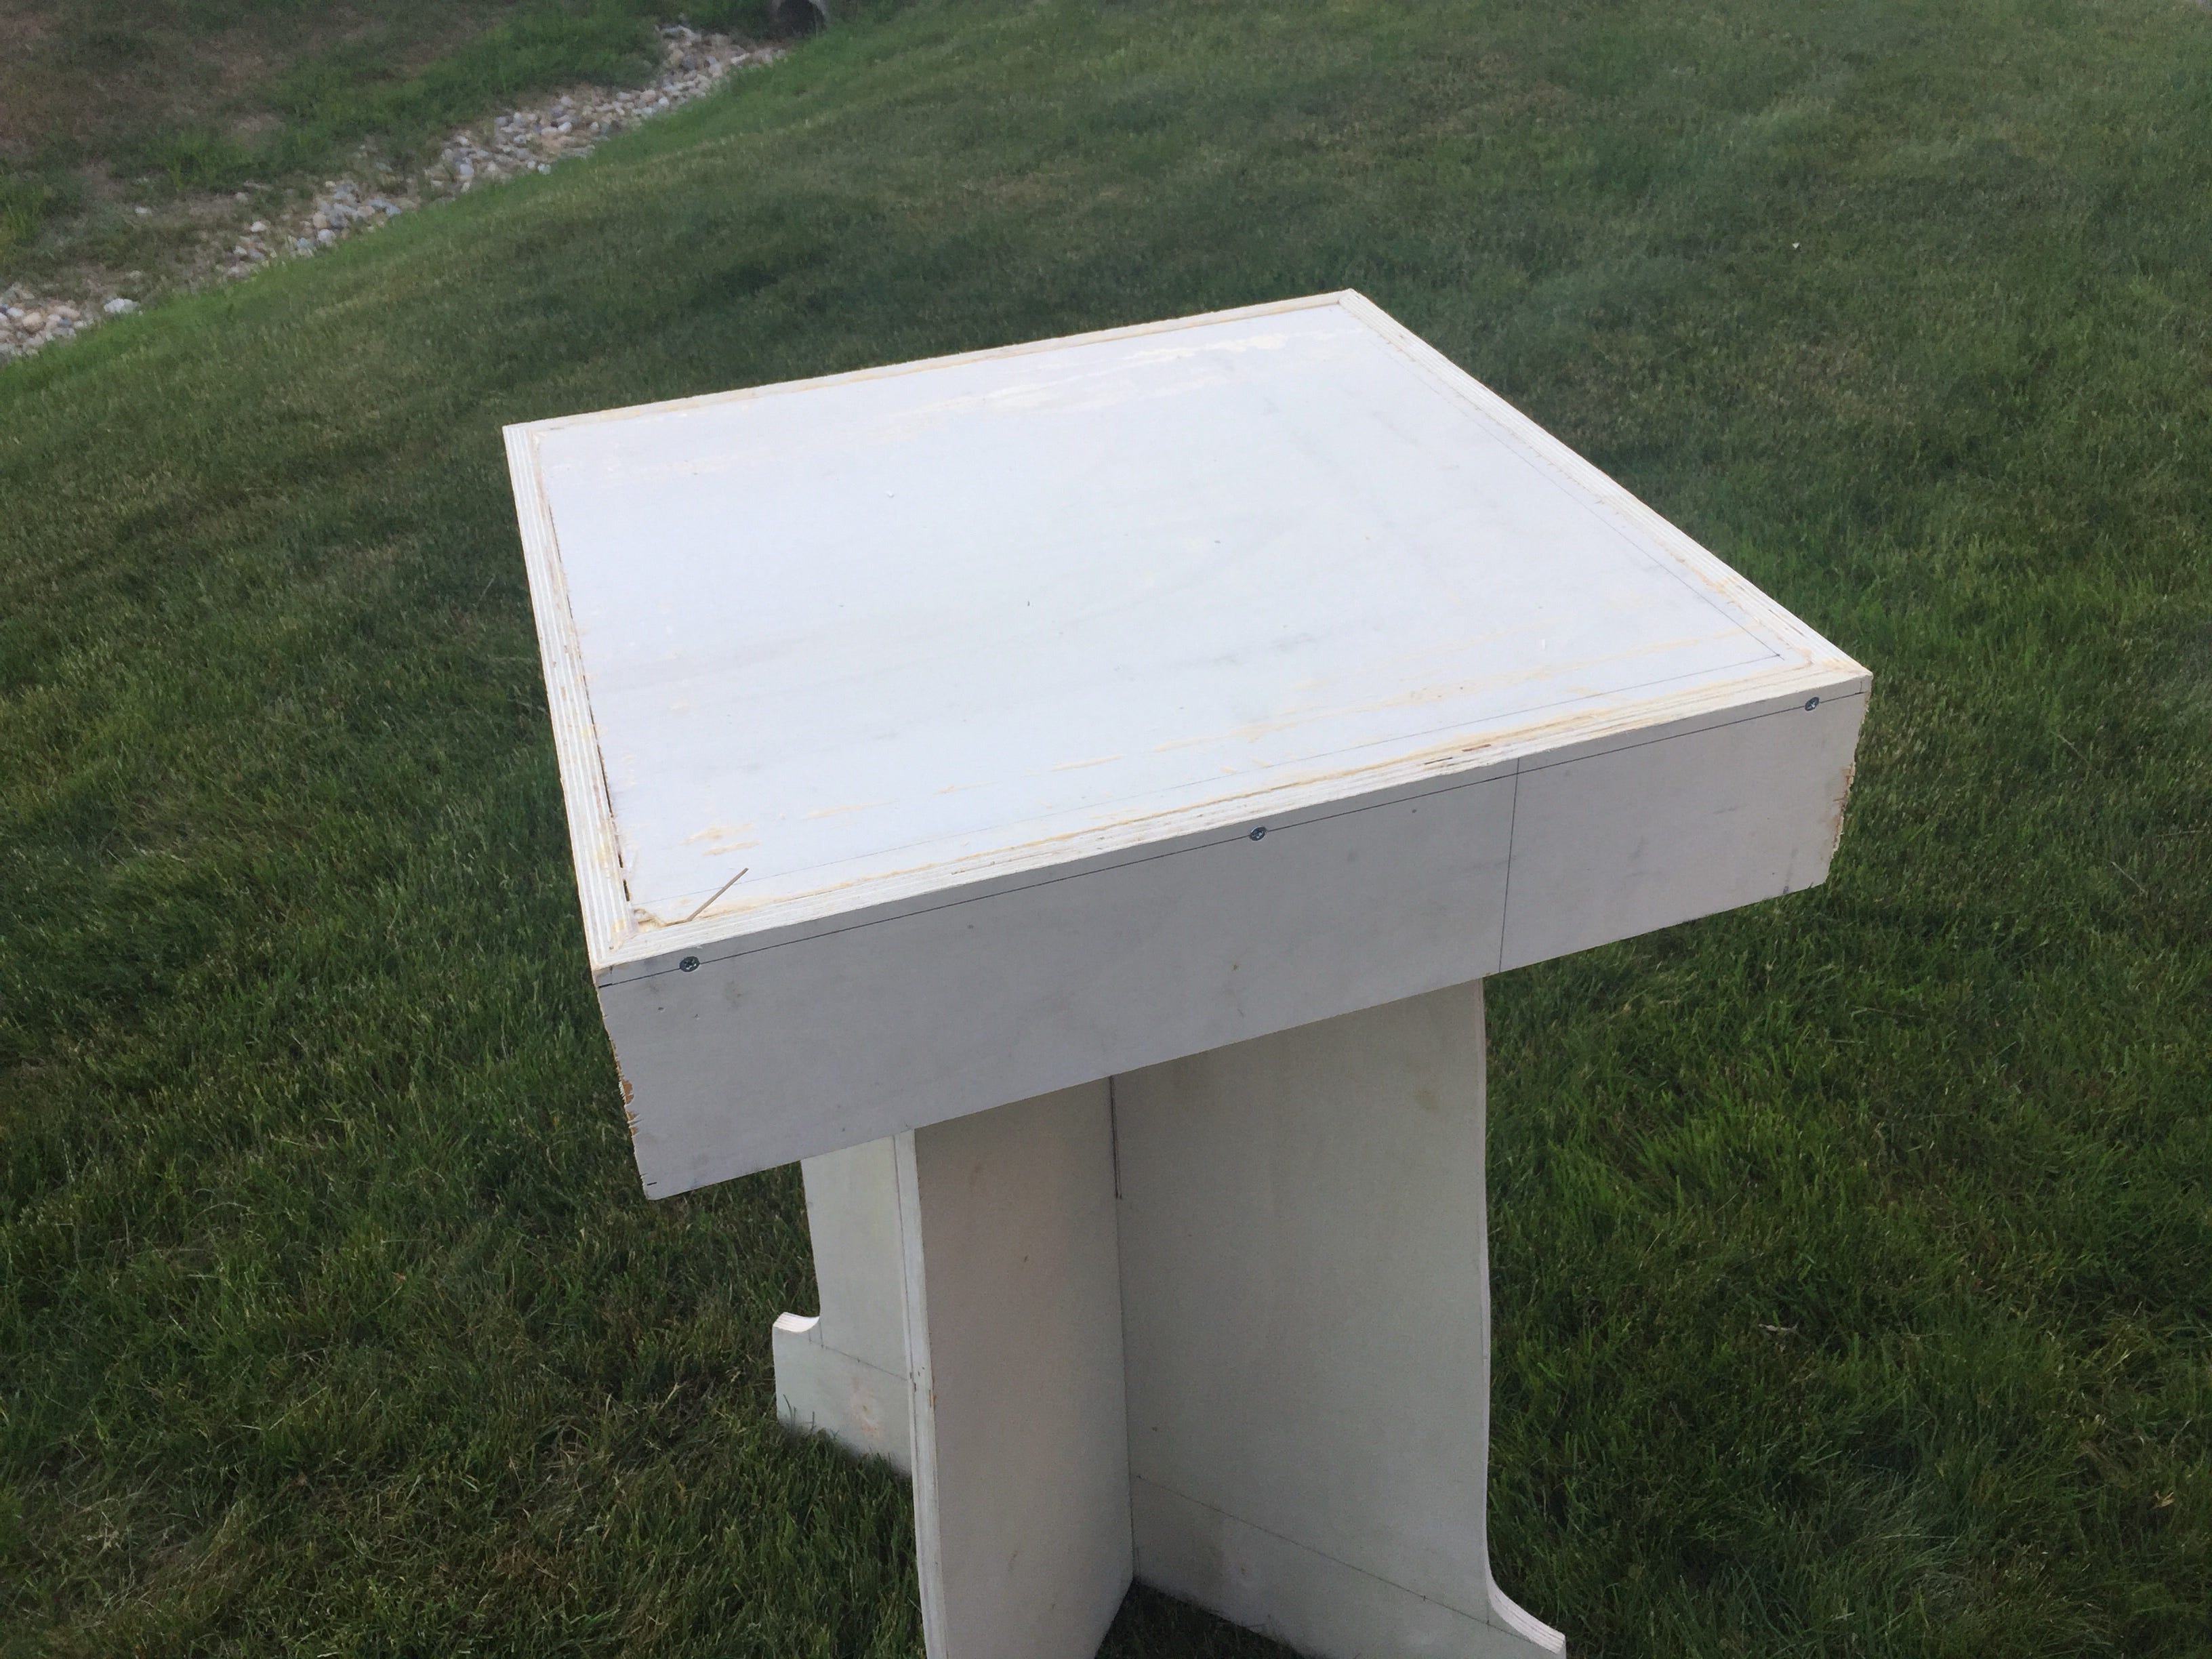
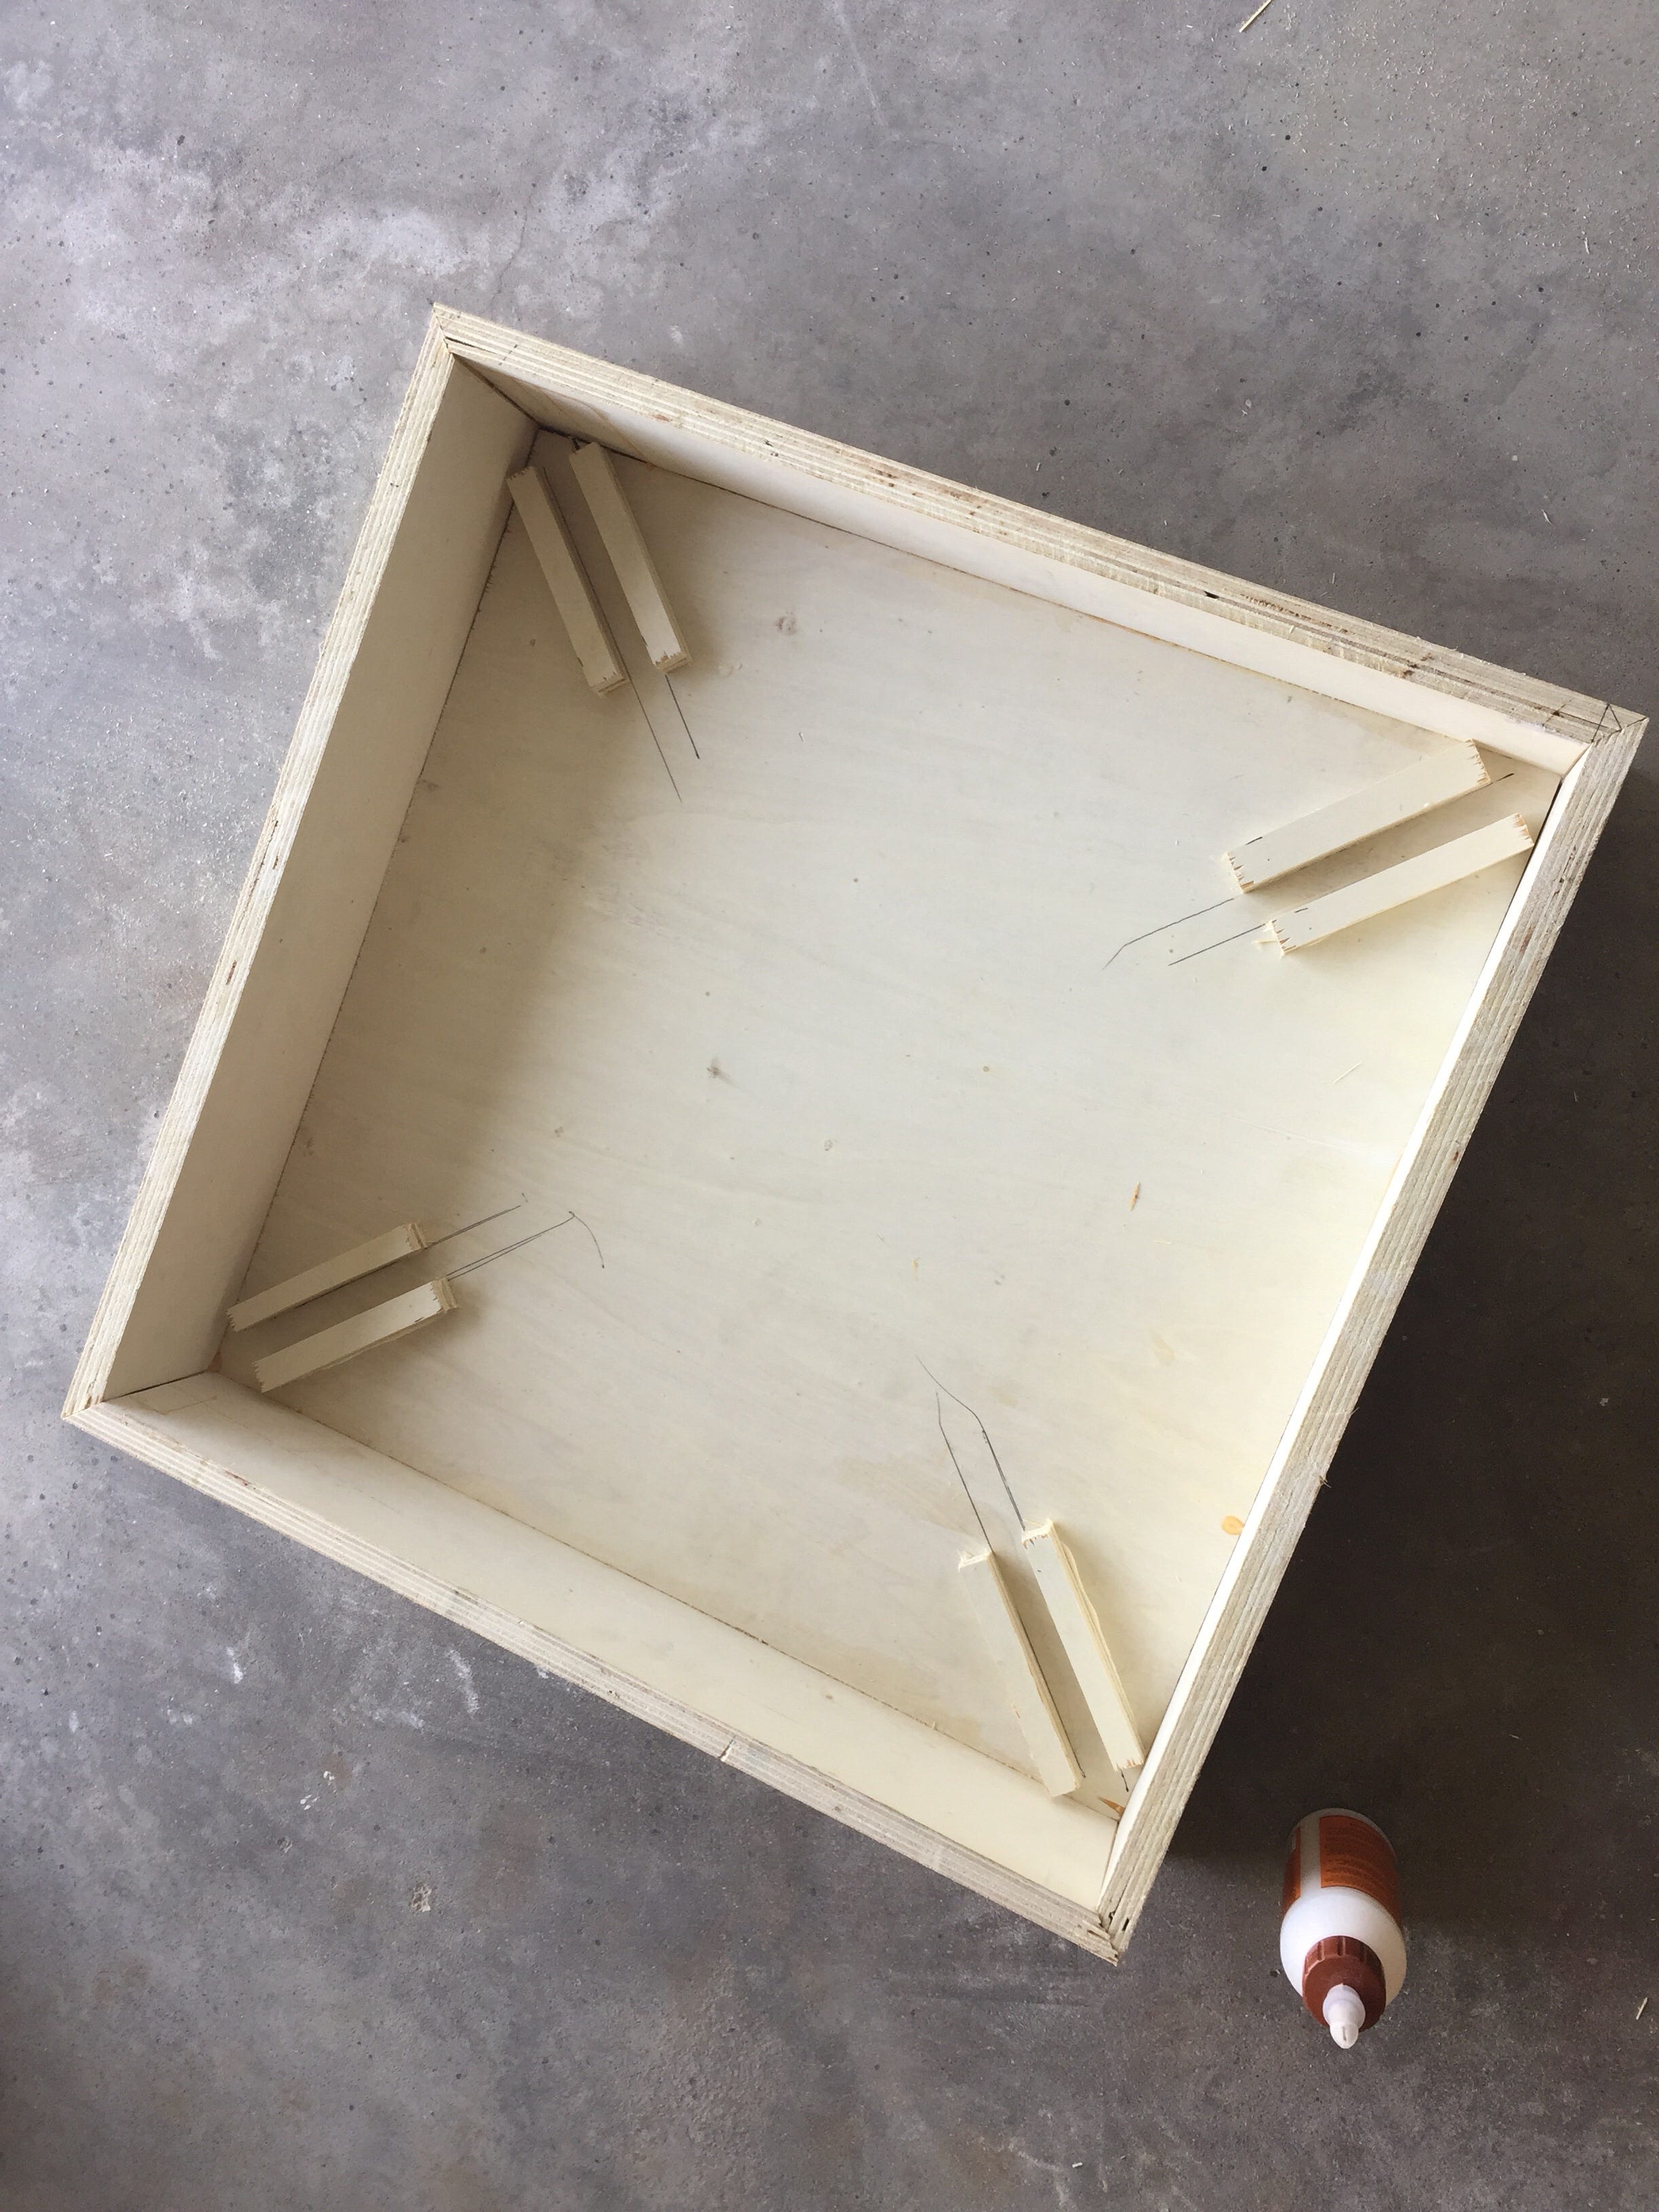
I fucked up pretty significantly numerous times and had to take a couple of passes at the table top before I figured it out. The board lengths weren't all uniform so they didn't fit well. There were some gaps between the boards and a spot where I chopped through the table top with the circular saw but I managed to figure it out with a combination of wood glue and screws. I tried using some particle board screws that I had lying around for some reason but the result was a little shitty and I had to remind myself that I was trying to make something beautiful here and had to be patient. The next day I bought some appropriate screws and the outcome was so much better. I filled the gaps in the boards and some of the spots that the jigsaw had butchered with putty and then sanded until it was smooth. I glued some scrap wood to the underside so I could slot the support boards so the table top wouldn't move around when it was in place.
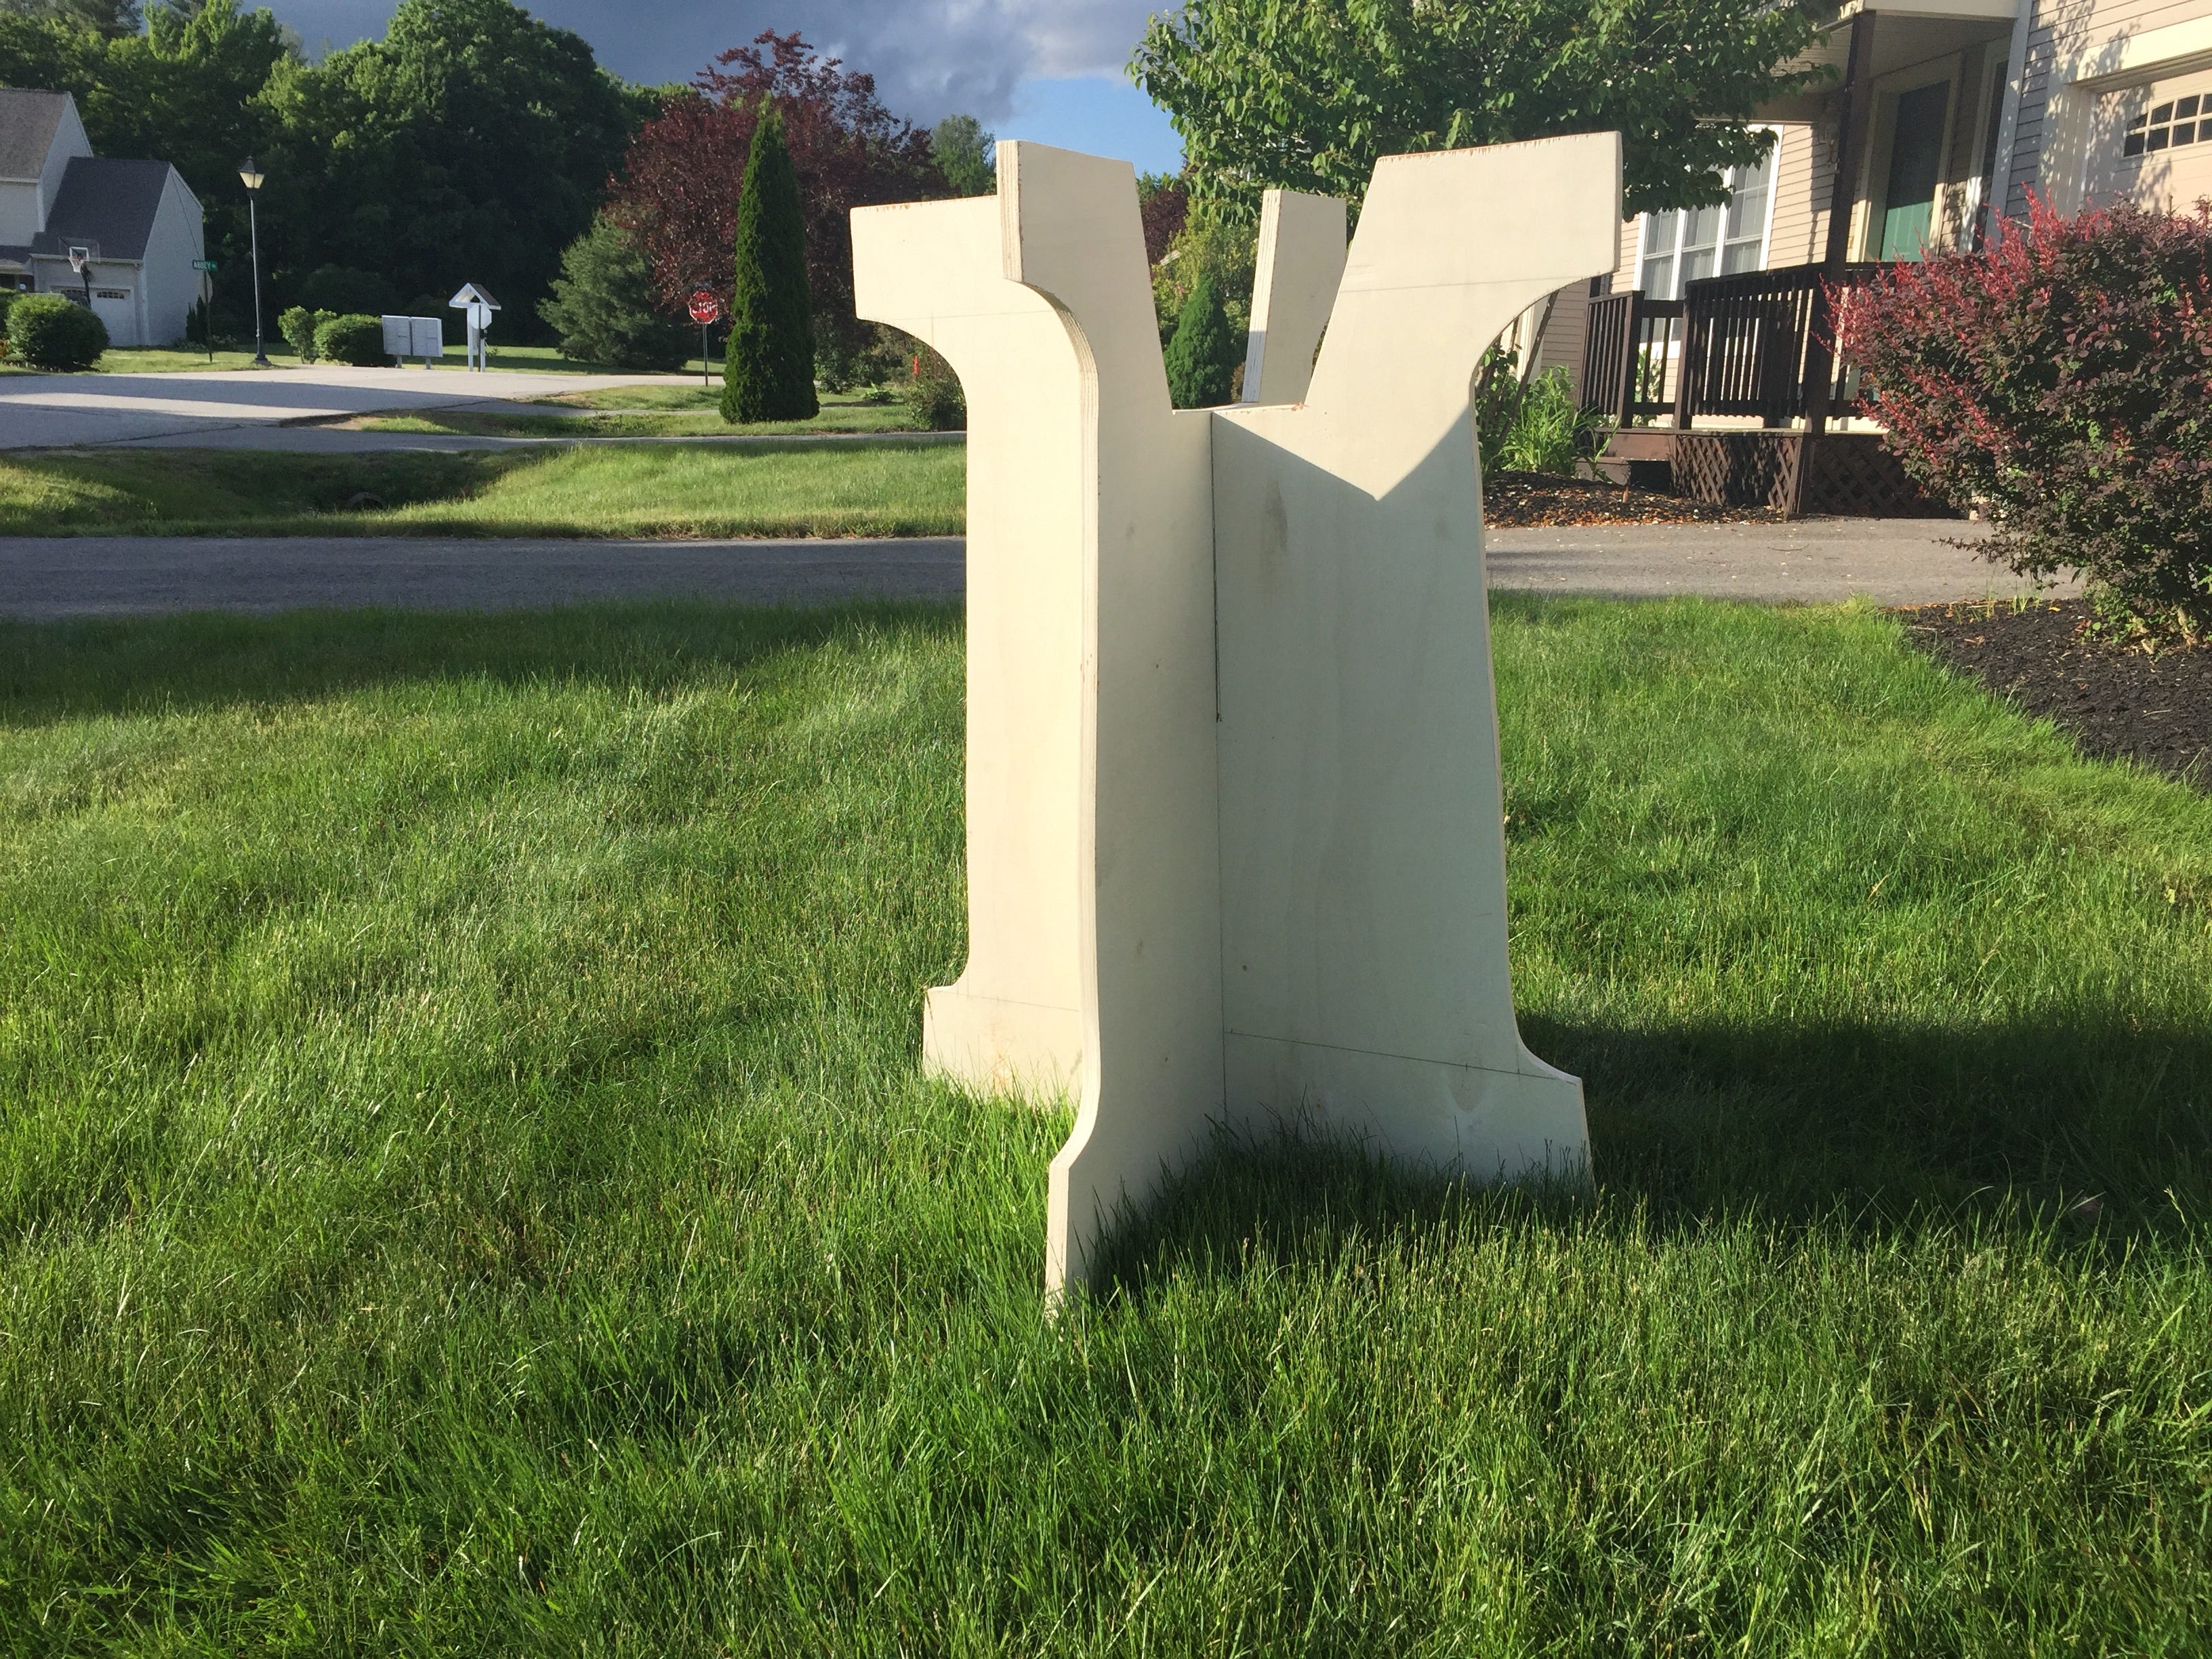
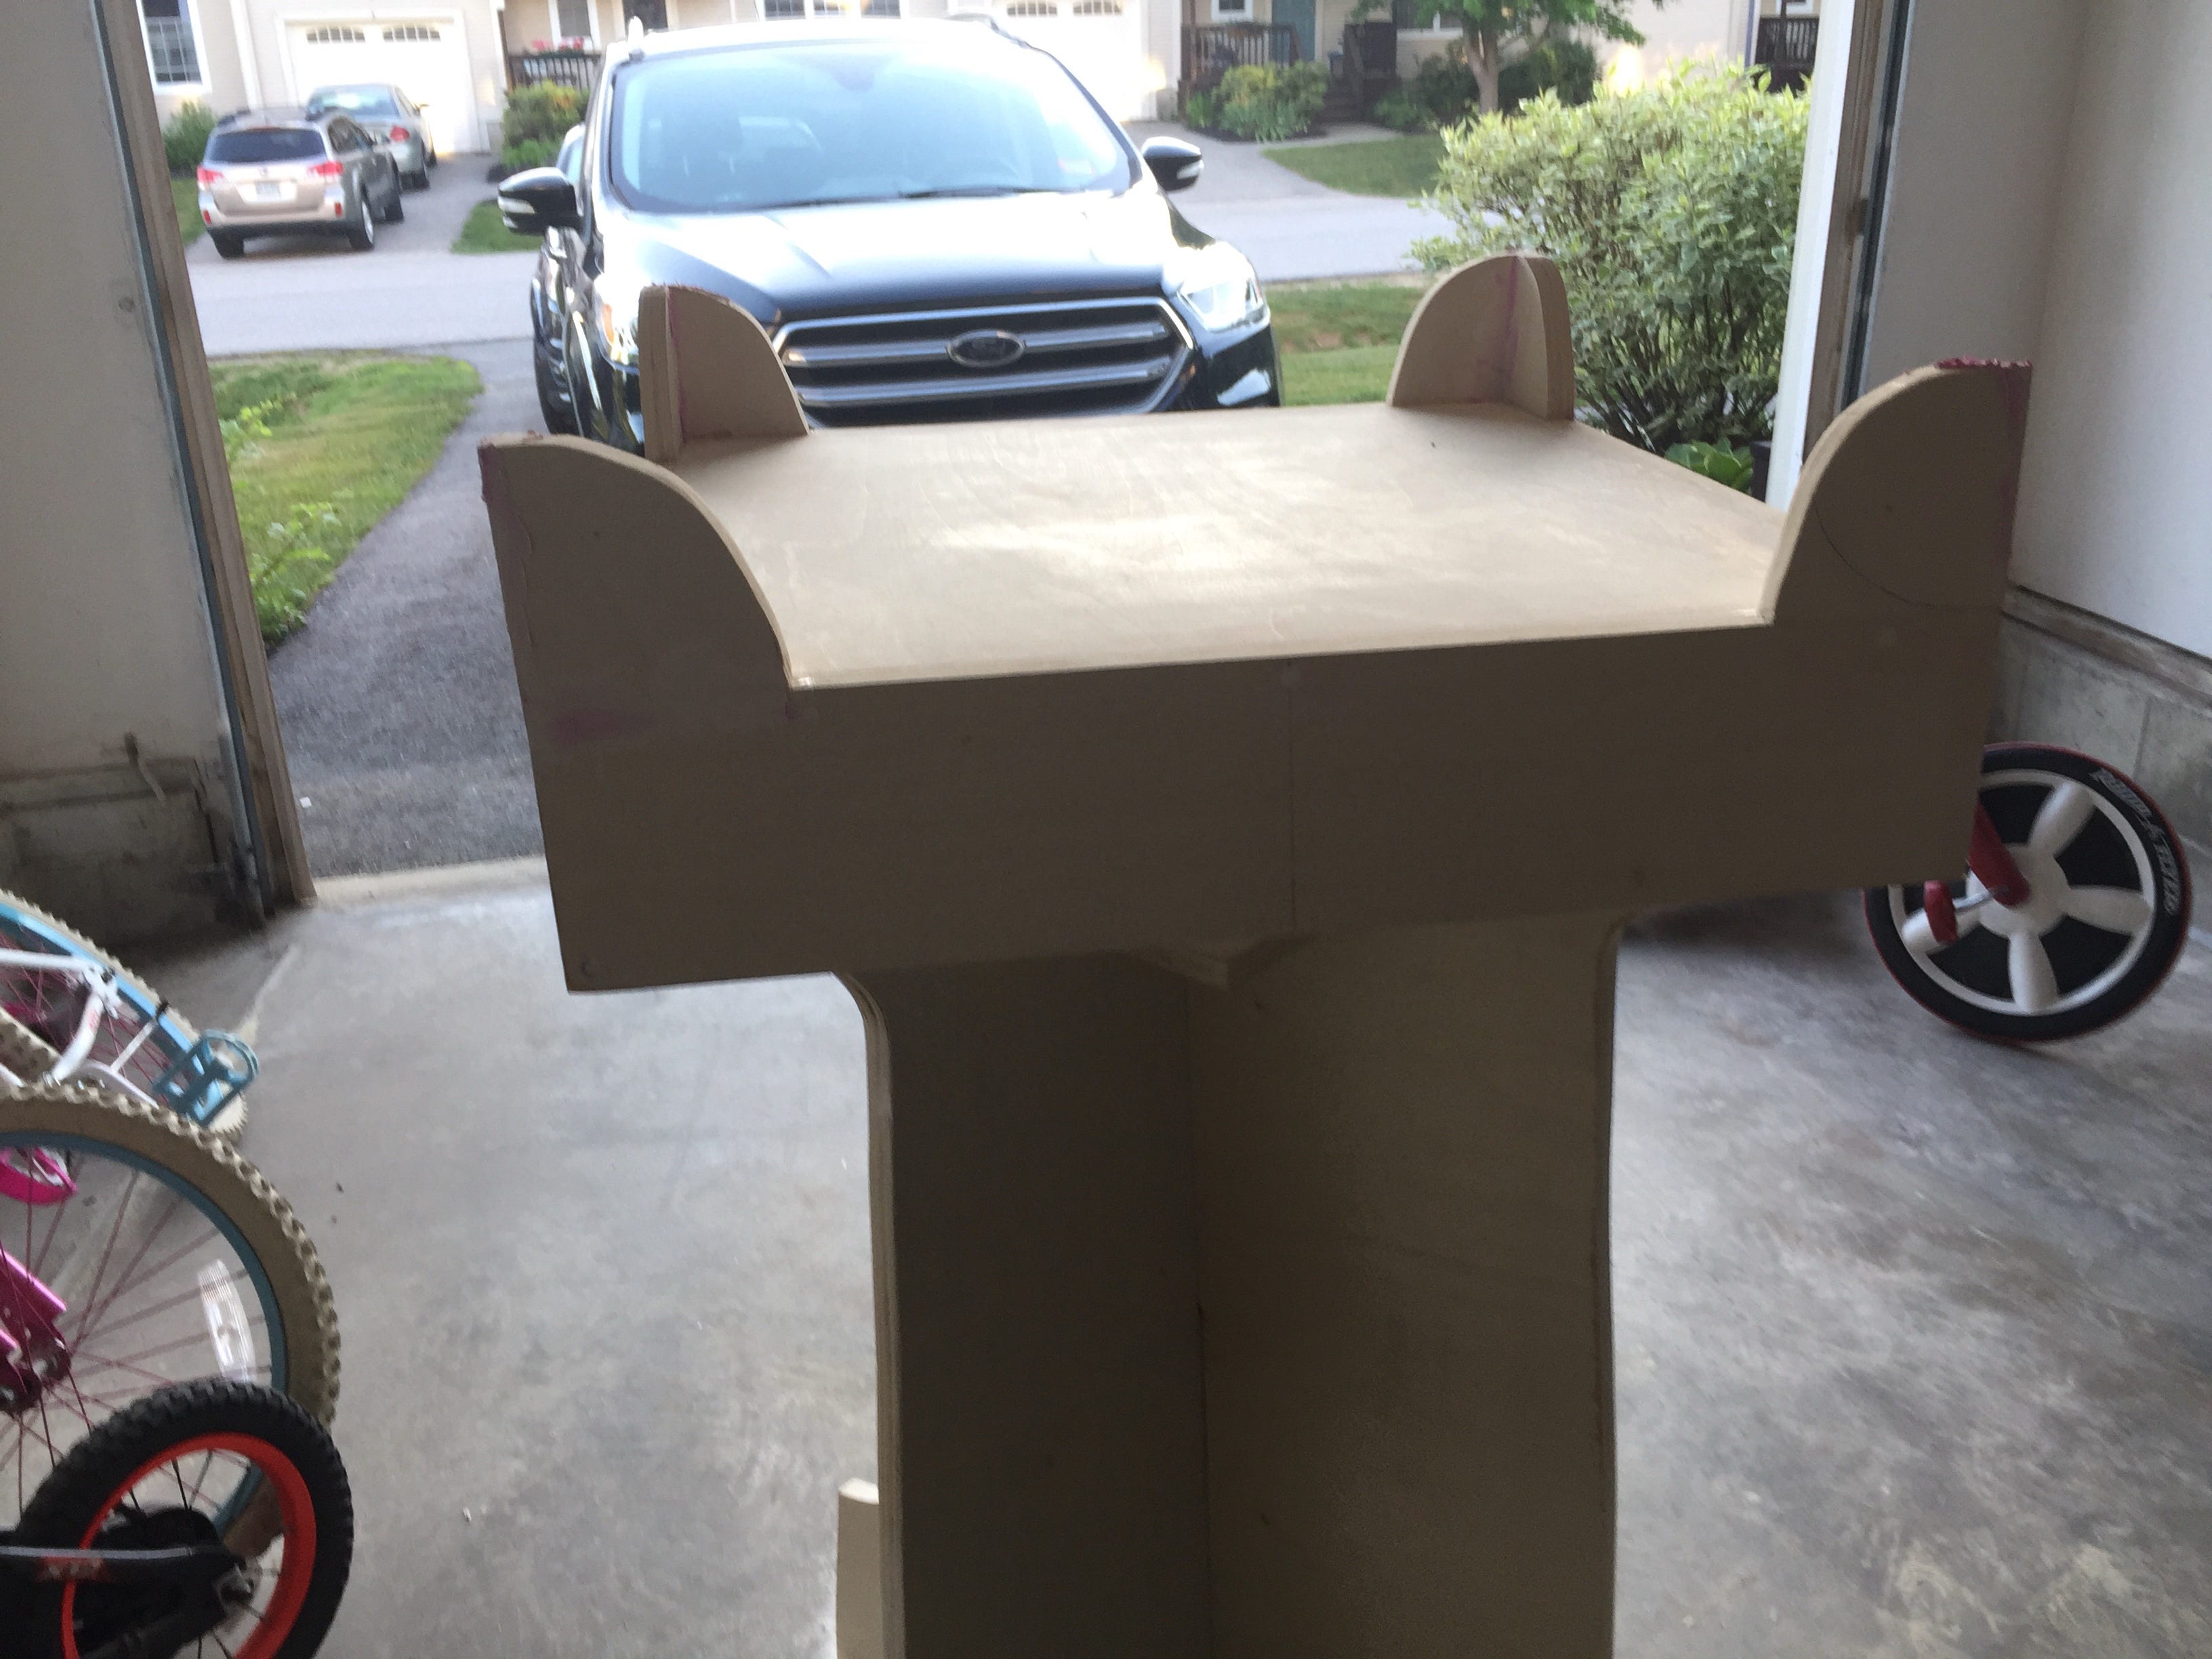
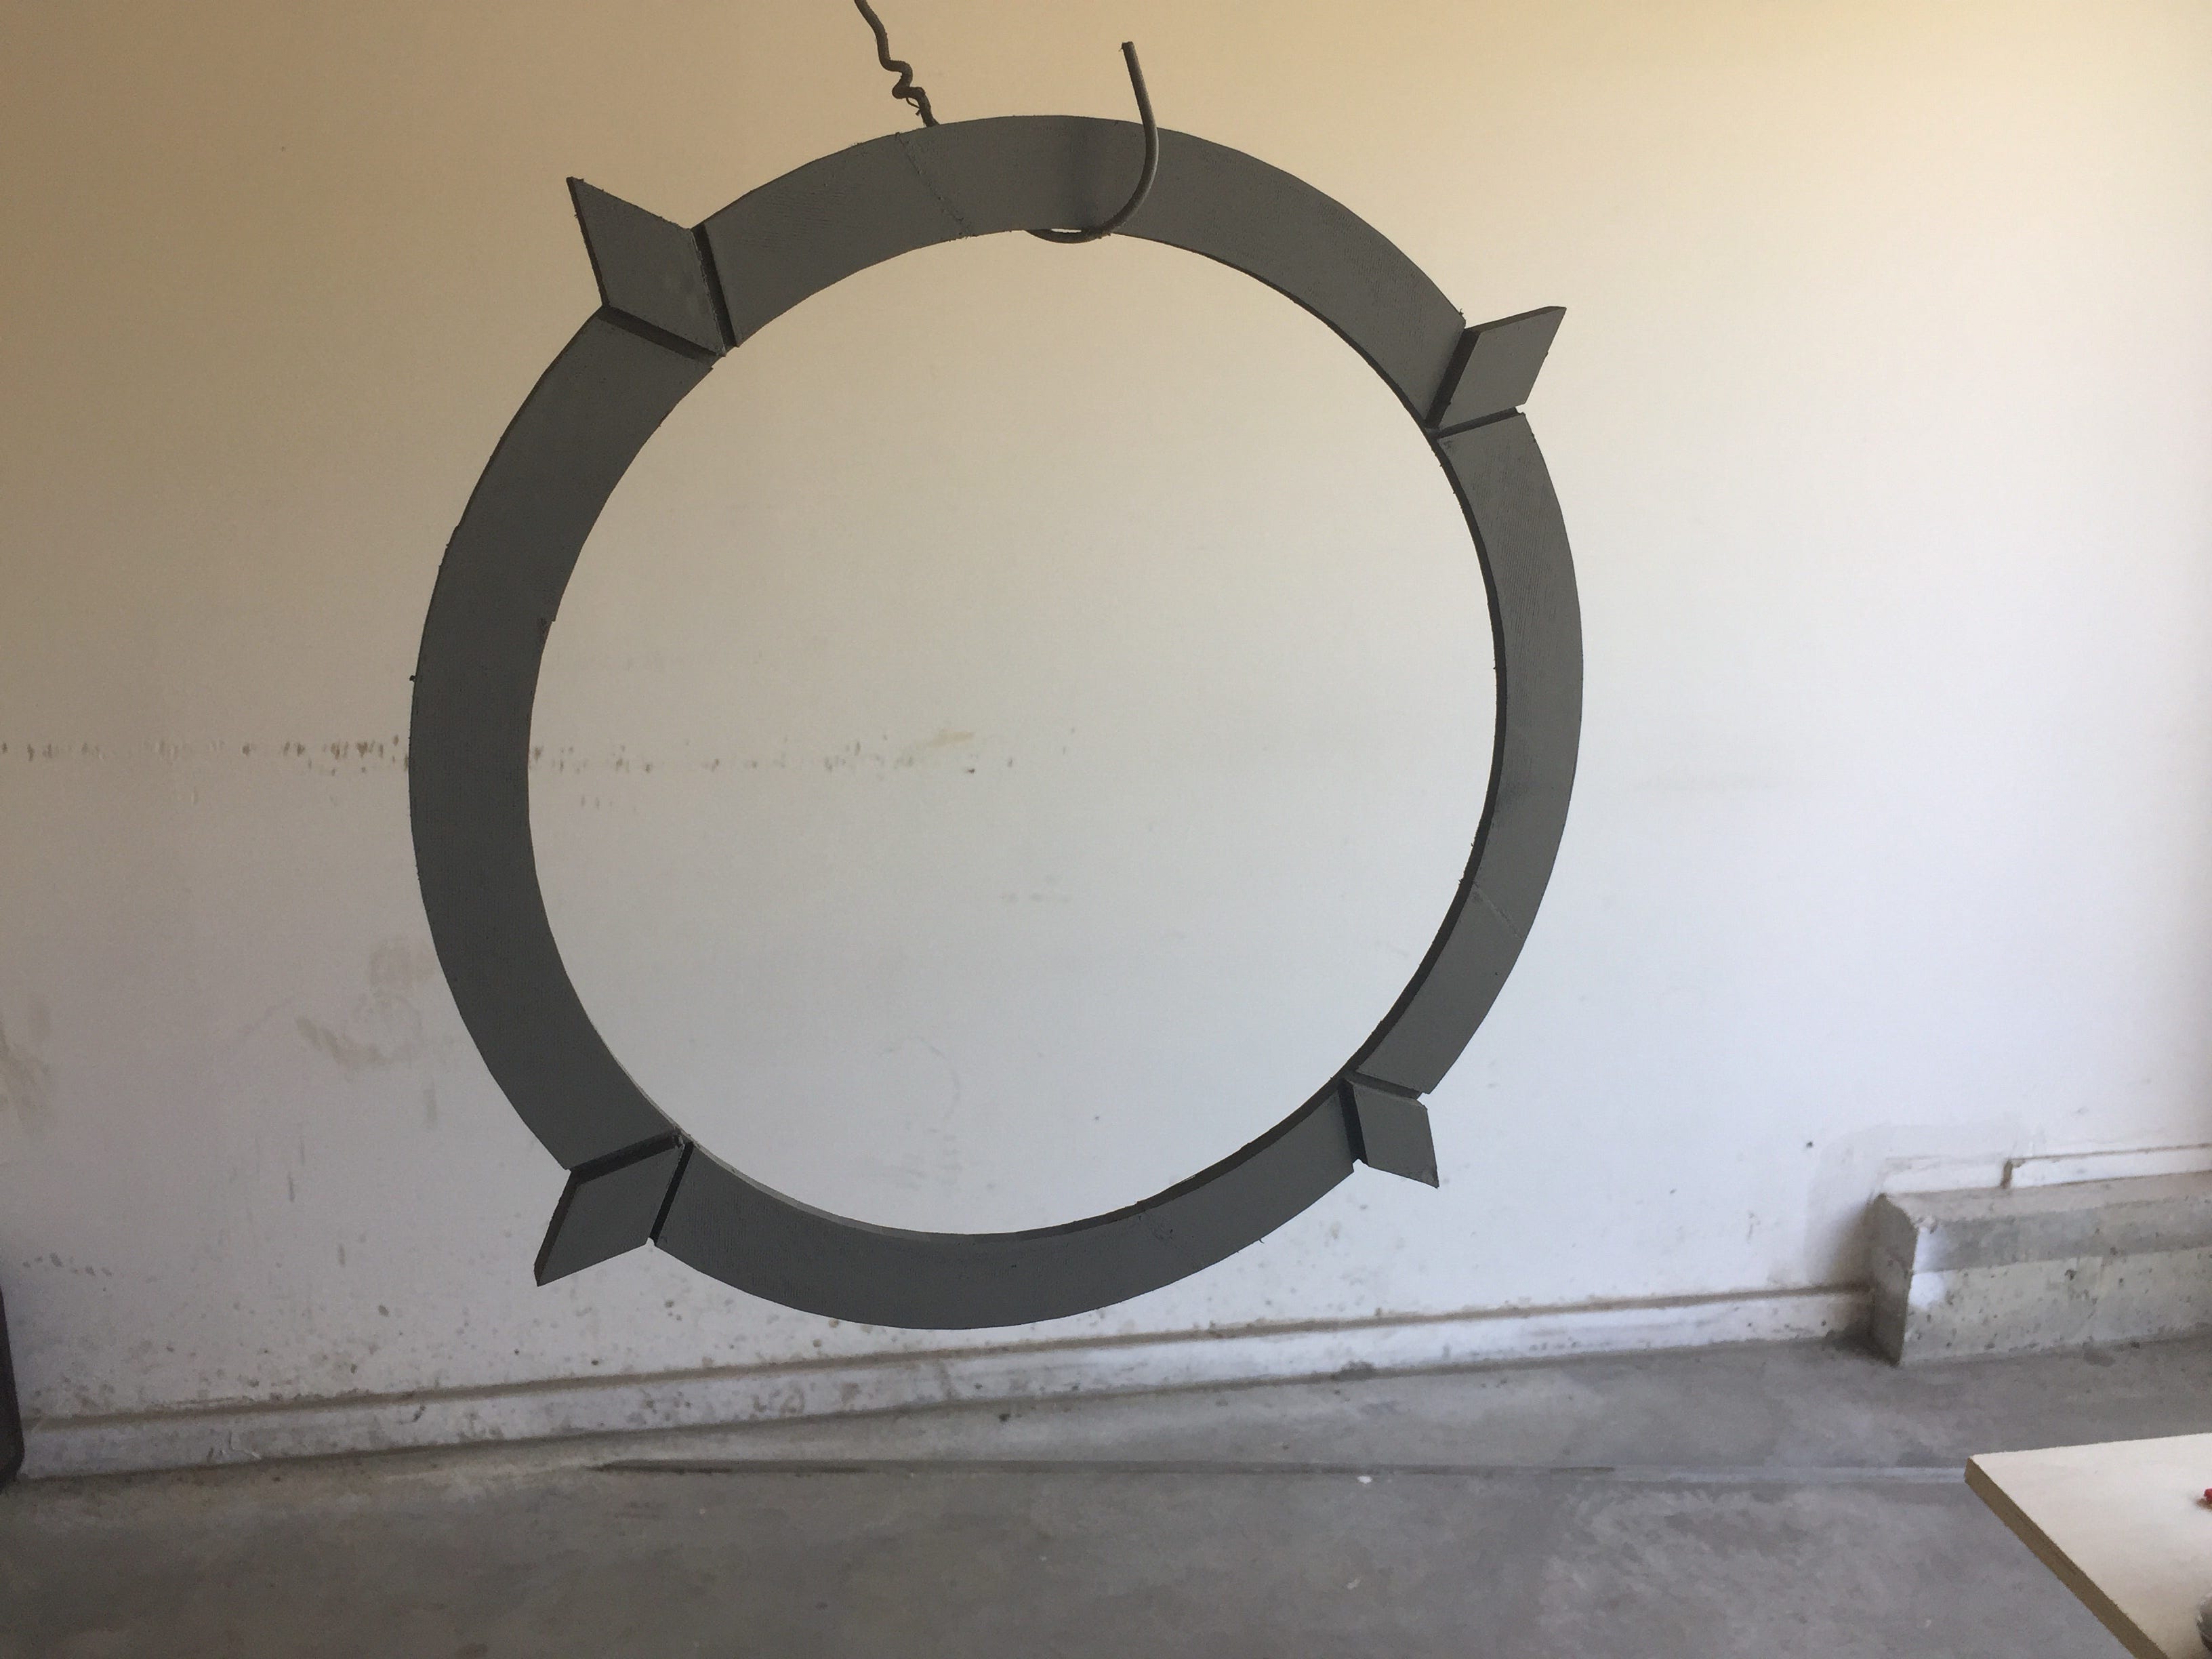
After that I added the horns to the altar. Around The Levant, archaeologists had been finding these Canaanite altars with hooded corners. Poke surmised that magicians were burning candles in the corners and sitting low at the altar to affect the light and the smoke on their reflective ritual objects in order to bring angels and demons to appearance and added this quality to his own altars as this assumption seemed to carry some weight with it. Now, all OTA altars have these horns. Again, I glued the pieces with wood glue and then filled any gaps with putty before sanding for a nice seamless and even surface.
Next up, I had to cut some vents for the incense smoke. Under the altar is a small plate where you put the incense censer so that when you do Almadel invocations, the smoke rises up through the altar and surrounds the shewstone. I wasn't crazy about this. First off, it was destructive and I stood a chance of really fucking this up but secondly, the table top was perfect. I loved the way it had come out and dreaded the prospect of ruining that. But all that was left after that was priming, painting, and adding the compass rose, so I got to work.
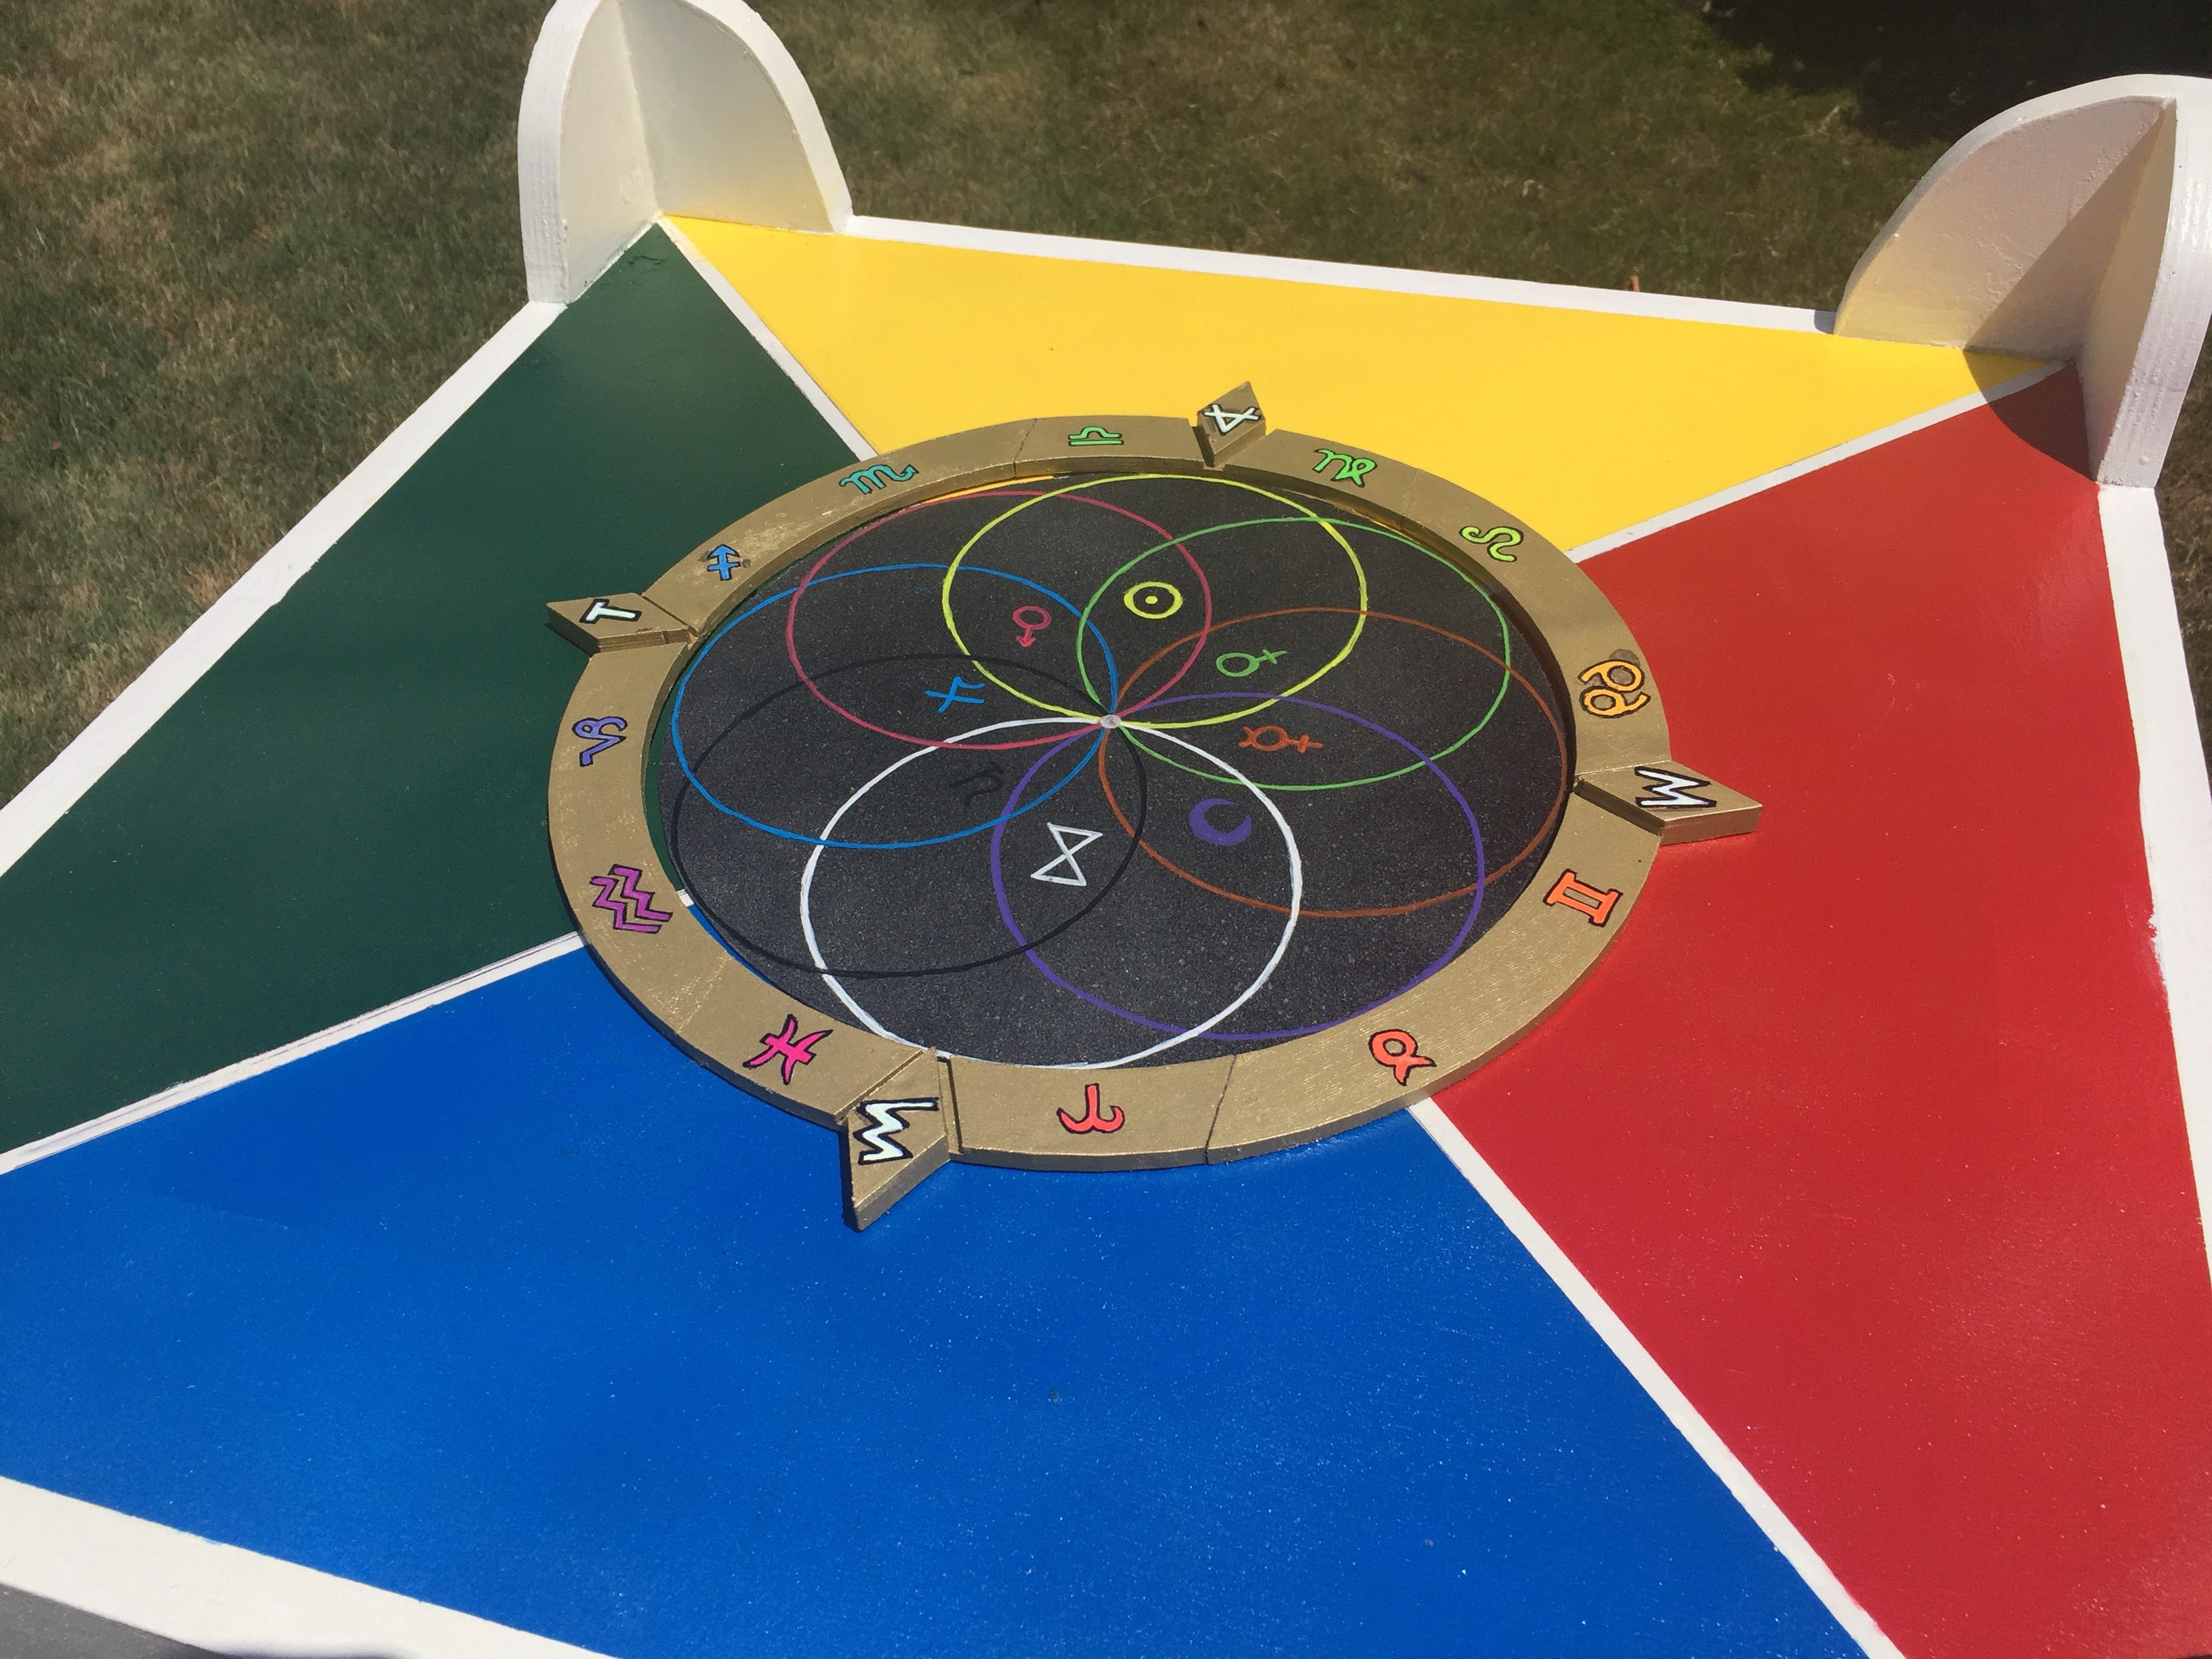
The photo of the vents is generous but they're all quite uneven. I designed the compass rose to mostly obscure them as I really don't care for how they turned out.
In photos of altars from other lodges, the altar top most commonly features a compass rose with a fleur de lis at each of the four positions and I wasn't crazy about that. For starters, I wasn't sure if I could cut that out but I also didn't want to duplicate existing altars. At this point in the project I was beginning to feel pretty confident about what I was doing and was ready to add some personal touches that made this my own. So, I designed my own compass rose and submitted it to Poke for approval.
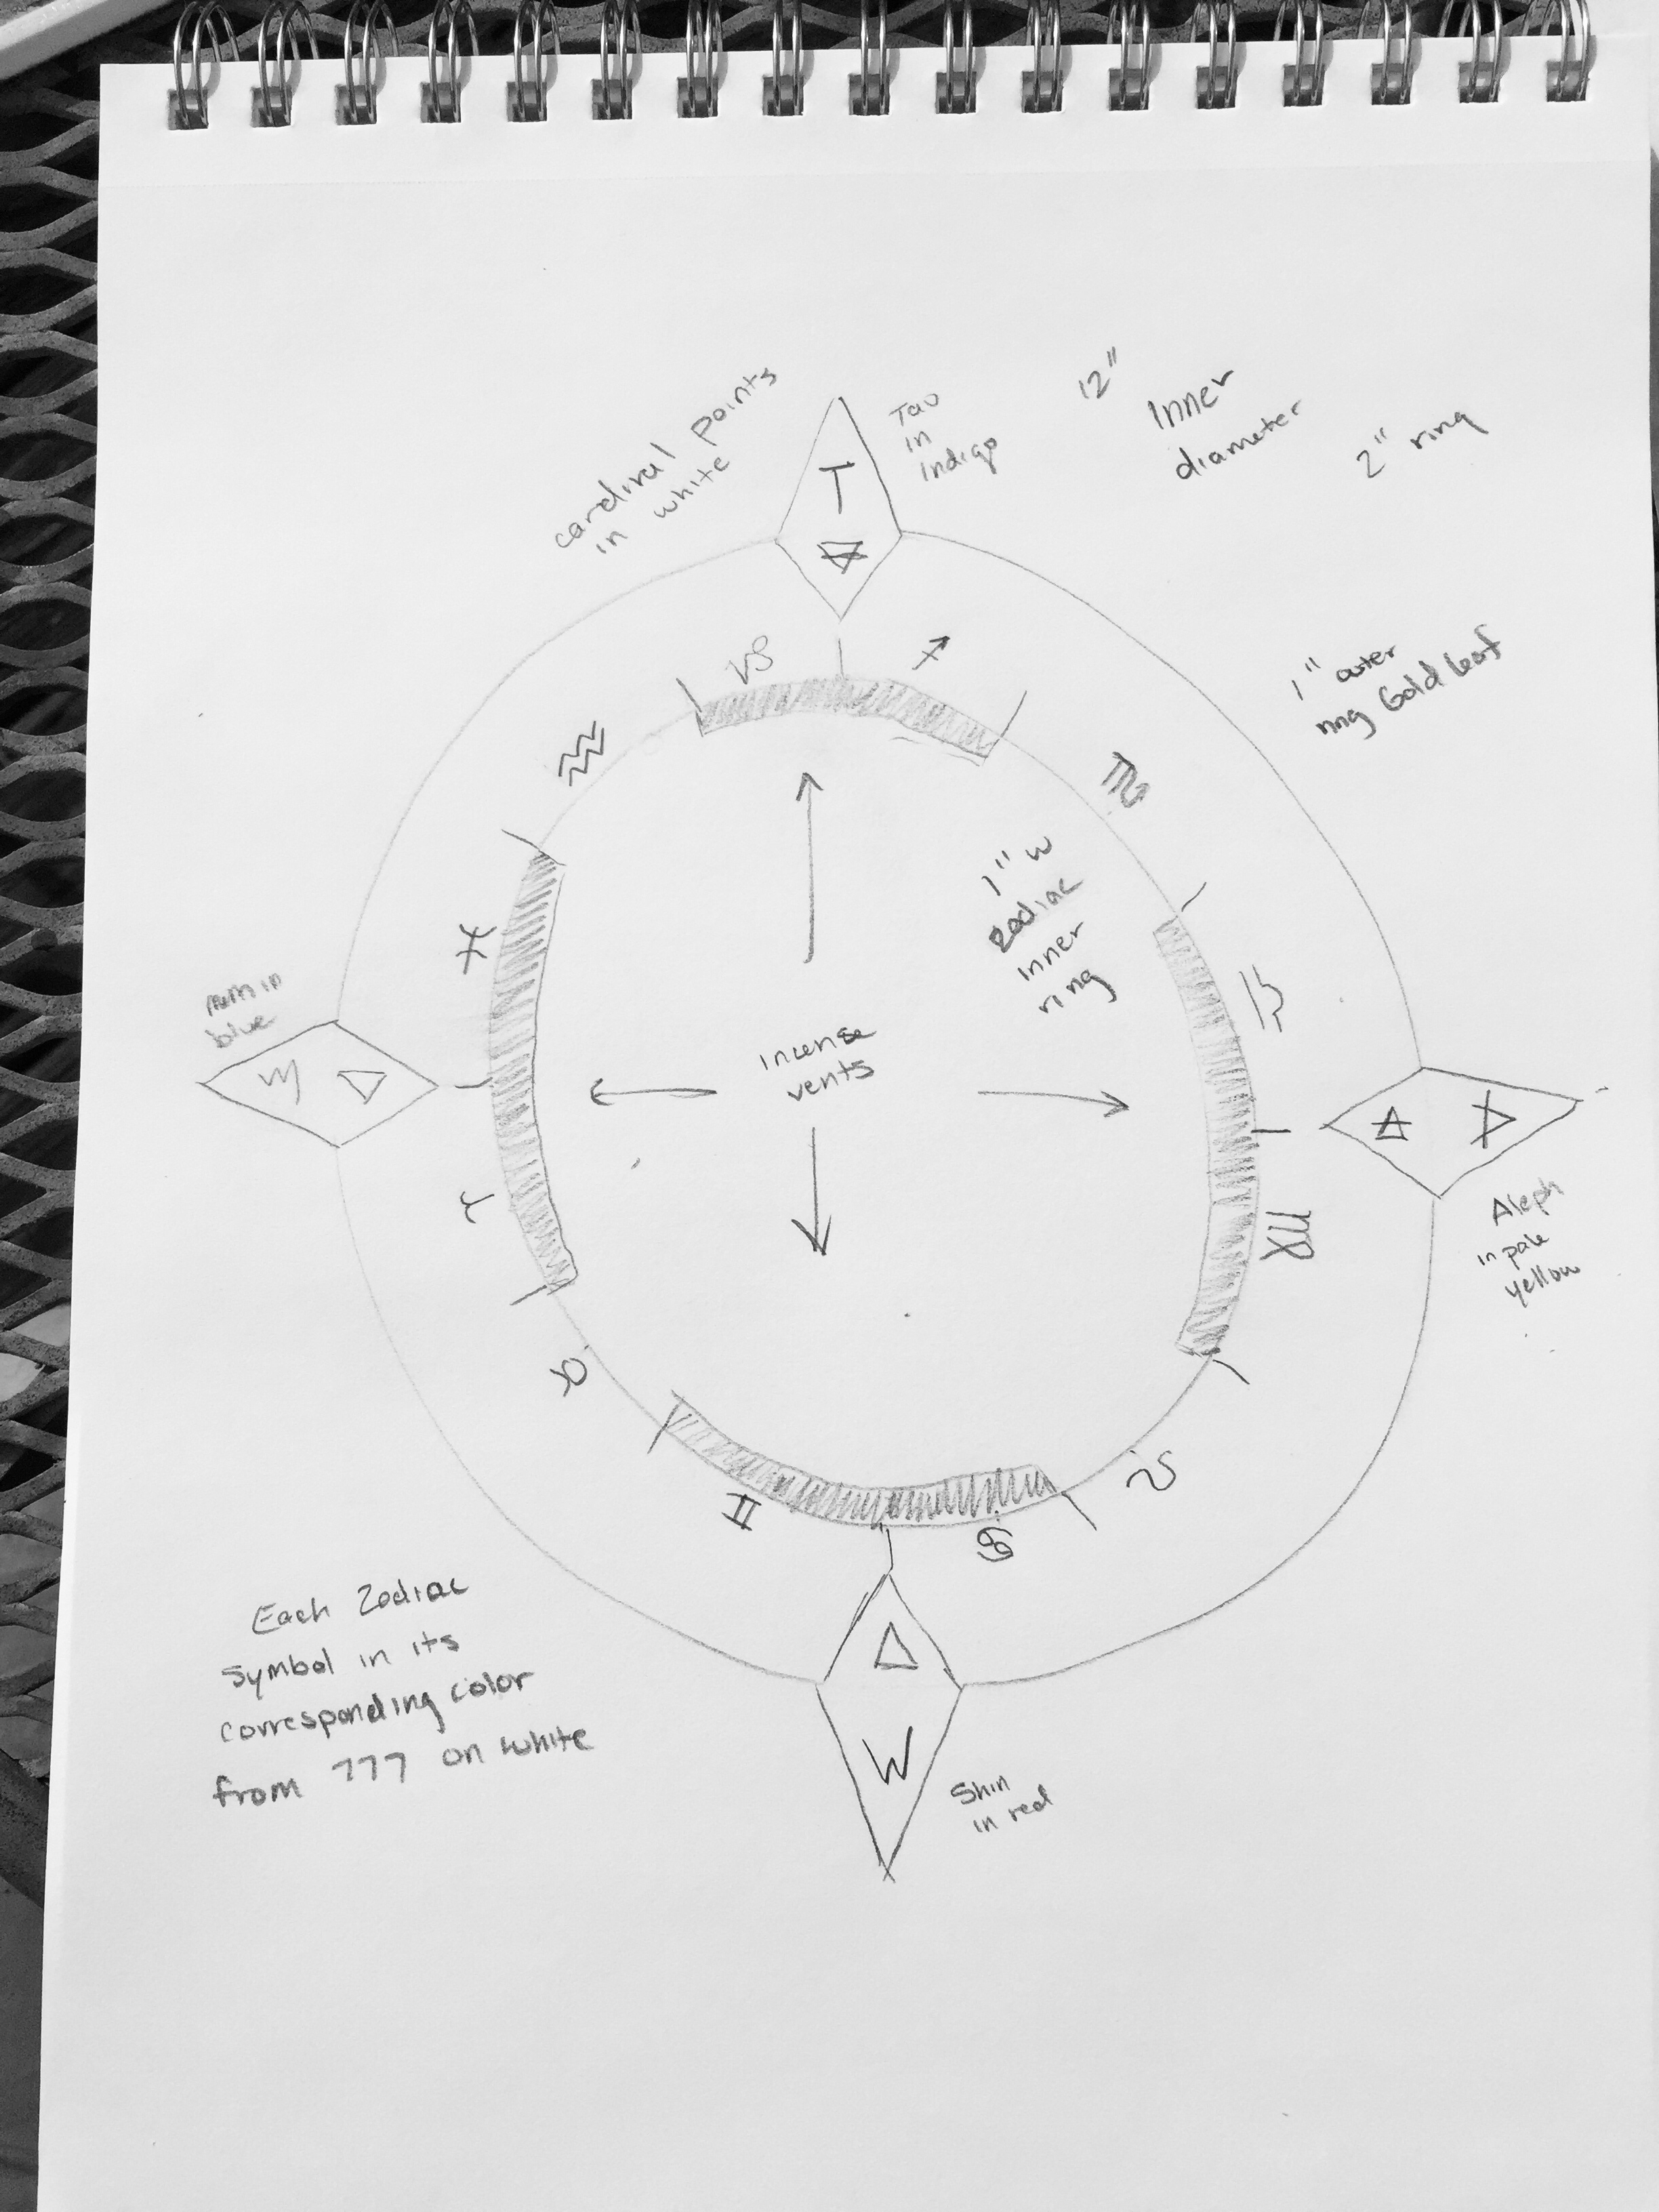
Poke had a couple of changes. No white paint, for starters, and shrinking the ring from 2" to 1". He also suggested cutting out the diamonds and offsetting them from the ring a bit. I got to painting the altar top while I made a plan for how to execute this compass rose.
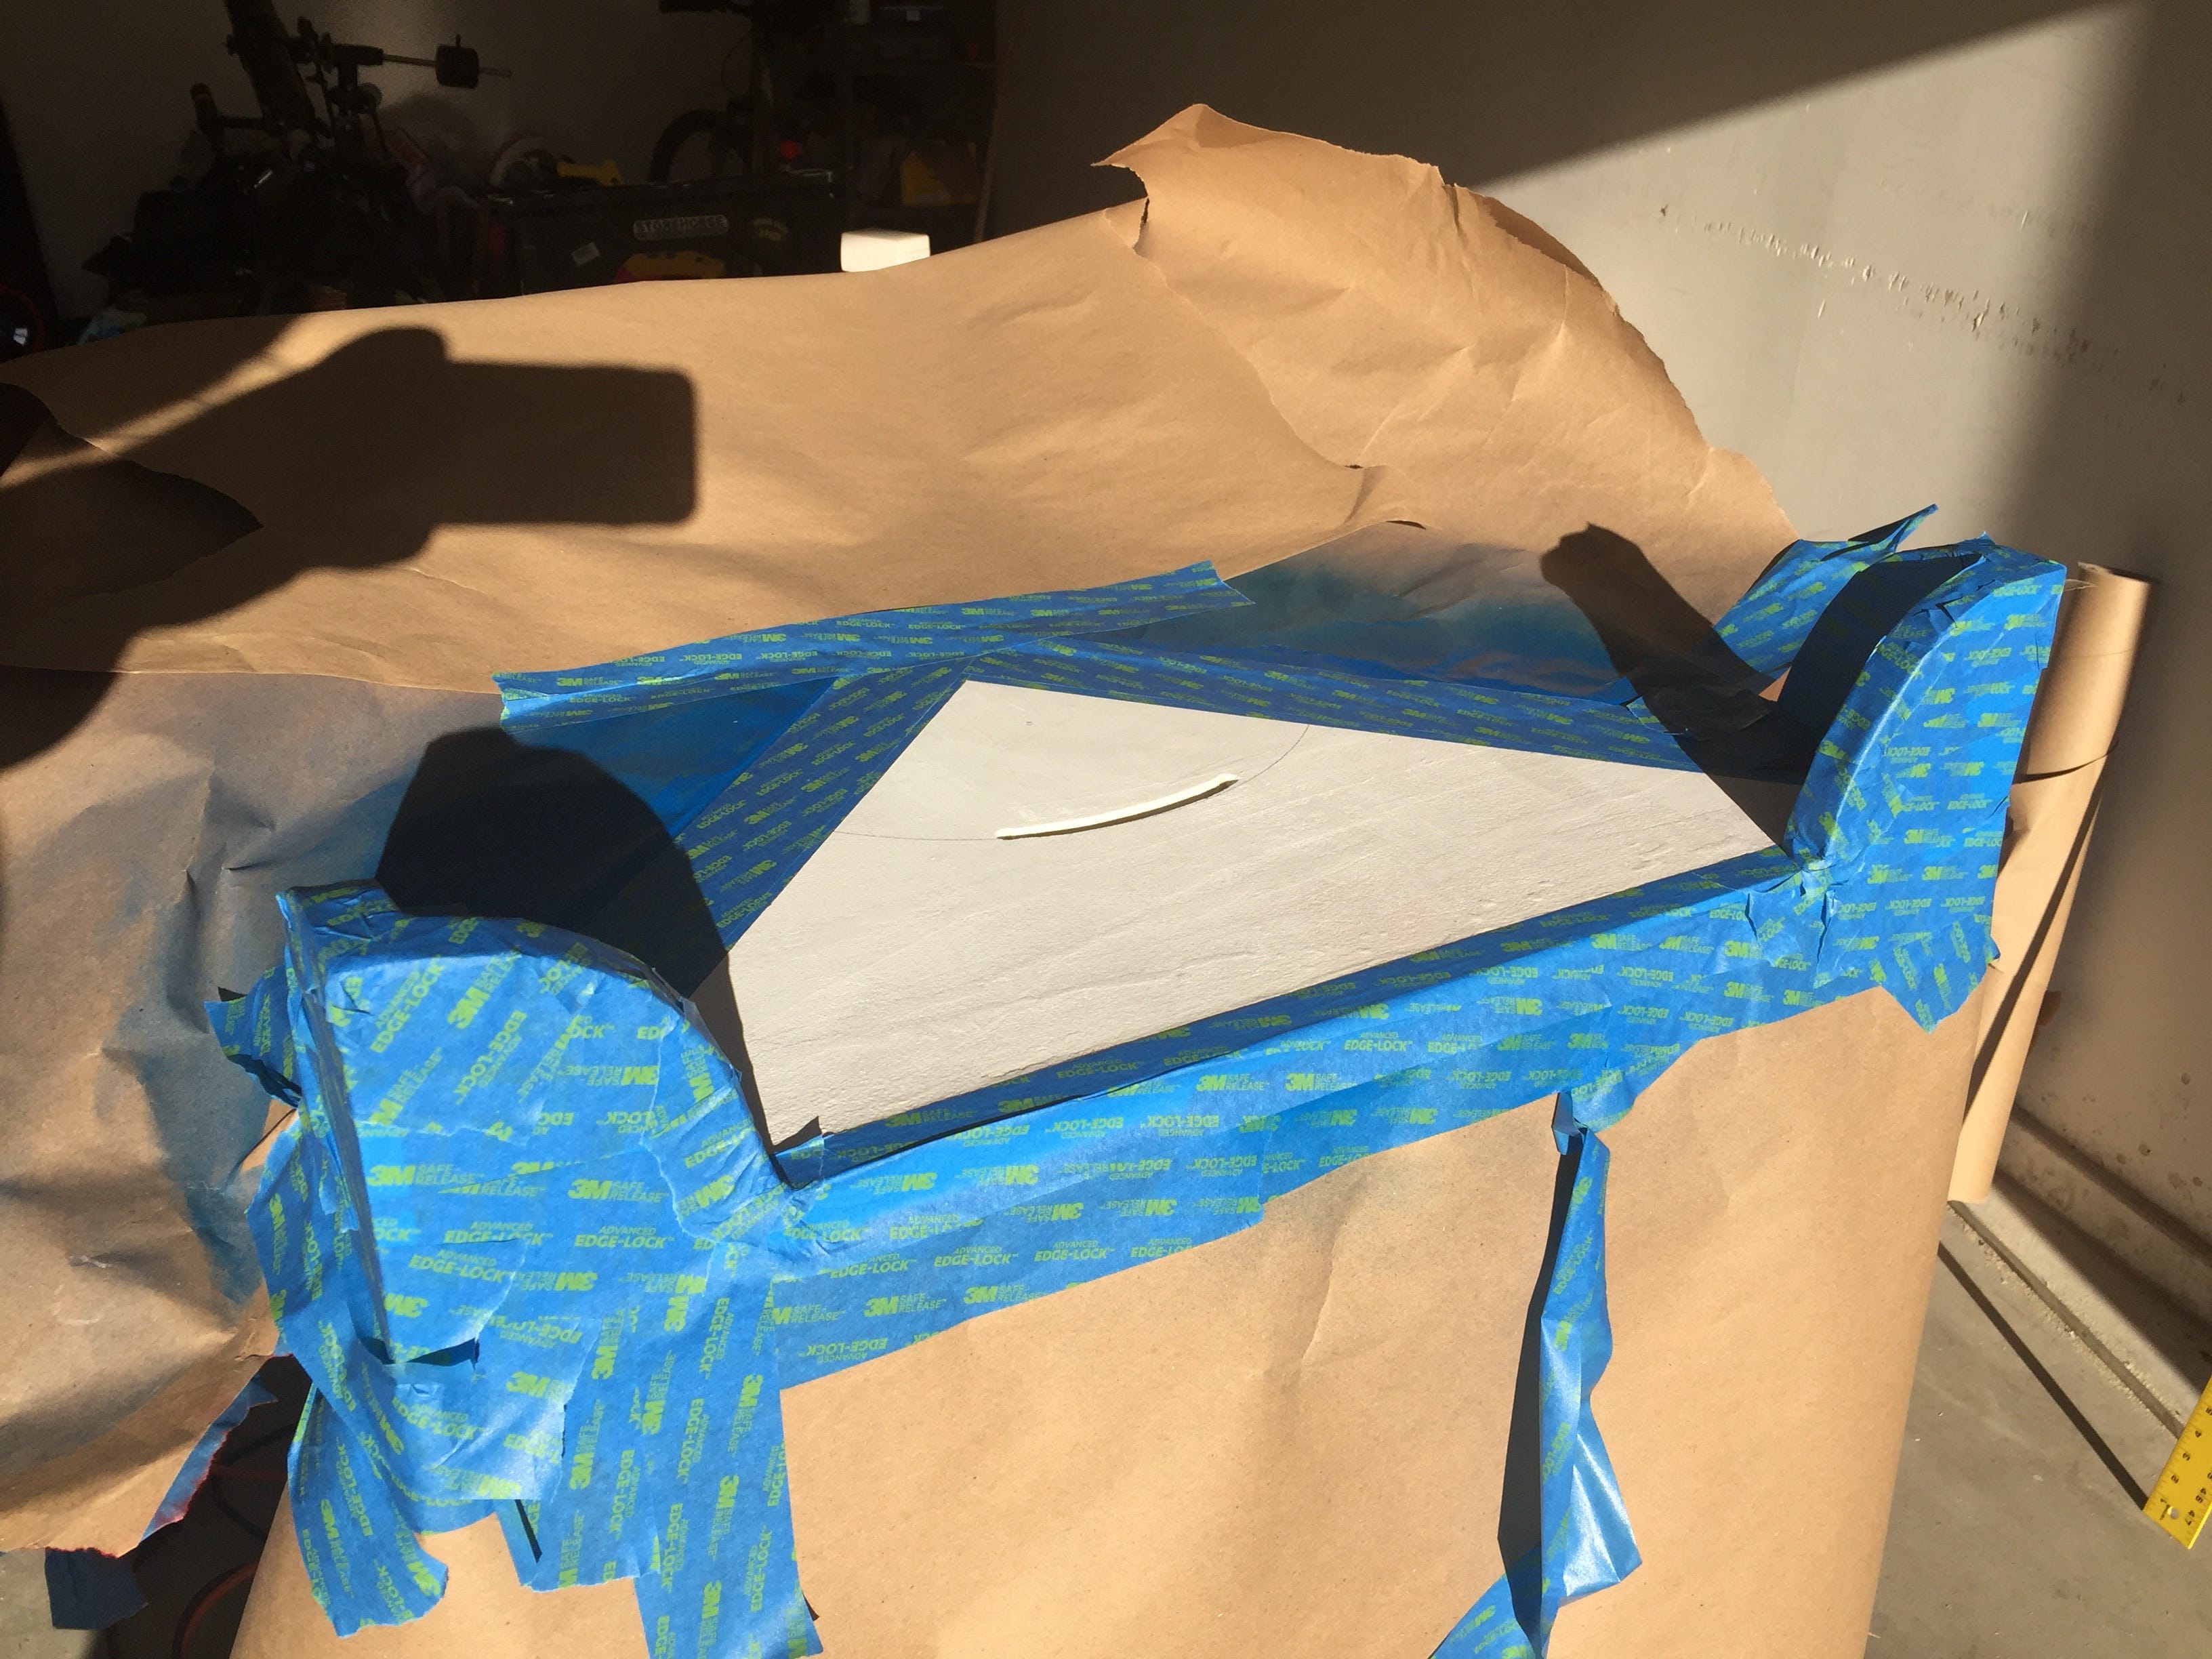
I used butchers paper and painters tape to mask off the sections I needed to paint and then finished with a couple of coats of a clear glaze to protect the paint. You figure there's going to be a lot of crap getting shifted around this altar, candle wax, and oils. May as well do my best to preserve it and make it easier to clean. I'd used this stuff that I'd bought at Michael's (a sign if I'd ever seen one) a while back to coat a game prop I'd made for a Call of Cthulhu scenario I was running for my friends and it was pretty great.
Meanwhile, I drew out the rose on some Luan plywood, a really nice Hawaiian wood but no matter what I did, I couldn't seem to stick the landing. My first attempt just flat out sucked and the second attempt didn't look right, no matter what I did. It just looked lousy and I didn't want this piece of garbage on my altar top. I also had plans to cut out the alchemical symbols for each of the directions on the outside edges of the table top but I just couldn't make it work and was quite frankly a little tired of cutting plywood. So I left it, unsure of what to do. That night I'd wake up in the early morning and the idea struck me.
3D print these parts.
Just as I'd never built anything like this, I'd never done any 3D printing. I went to school with the intention of getting into video game design or special effects so I had done some modeling and animation but this was a long time ago when that sort of software required specialized powerhouse Silicon Graphics computers with software licenses which cost into the thousands of dollars for a single one. Nowadays there are web applications which allow you to model 3D objects in your browser window for free, so the medium has changed enough for my knowledge on the subject to be completely moot. But, like the rest of this project, a little bit of experimentation and practice goes a long way and in a couple of hours I had learned how to use the TinkerCAD system well enough to model the objects I needed and export them for printing.

From the start, I had some ideas for the edges of the altar top to have embossed alchemical symbols. In photos of the double cube altars, they're raised pieces of plywood painted to represent sulphur, salt, mercury, and spirit. One of them is hinged so you can place the incense in the altar. You also need these symbols on the double slat altar design and the altars of that design typically have them painted on but, again, I wanted to add some personal touches to my altar. So I also modeled those and sent them out for printing. Important note about my printing experience: There are a million online services that offer printing services for your 3D models. In my case, I'm lucky to live near a public library that has a couple of these printers for public use. I've also zipped up these elements and made them available here as well as on the OTA associates website.

It took about a week, as the library has a queue of people waiting to have their models printed but after a quick drive up to the library and back, I had in hand the four symbols and my compass rose.


Oh, yeah. See, the printing area for most of these printers is quite small and as it would happen, the library printing tech got back to me, informing me that the size of the rose was too big for the printer and after a bit of back and forth told me that they could accomodate by cutting it into several pieces in a CAD program, printing those pieces out and then handing them over to me to be glued together.
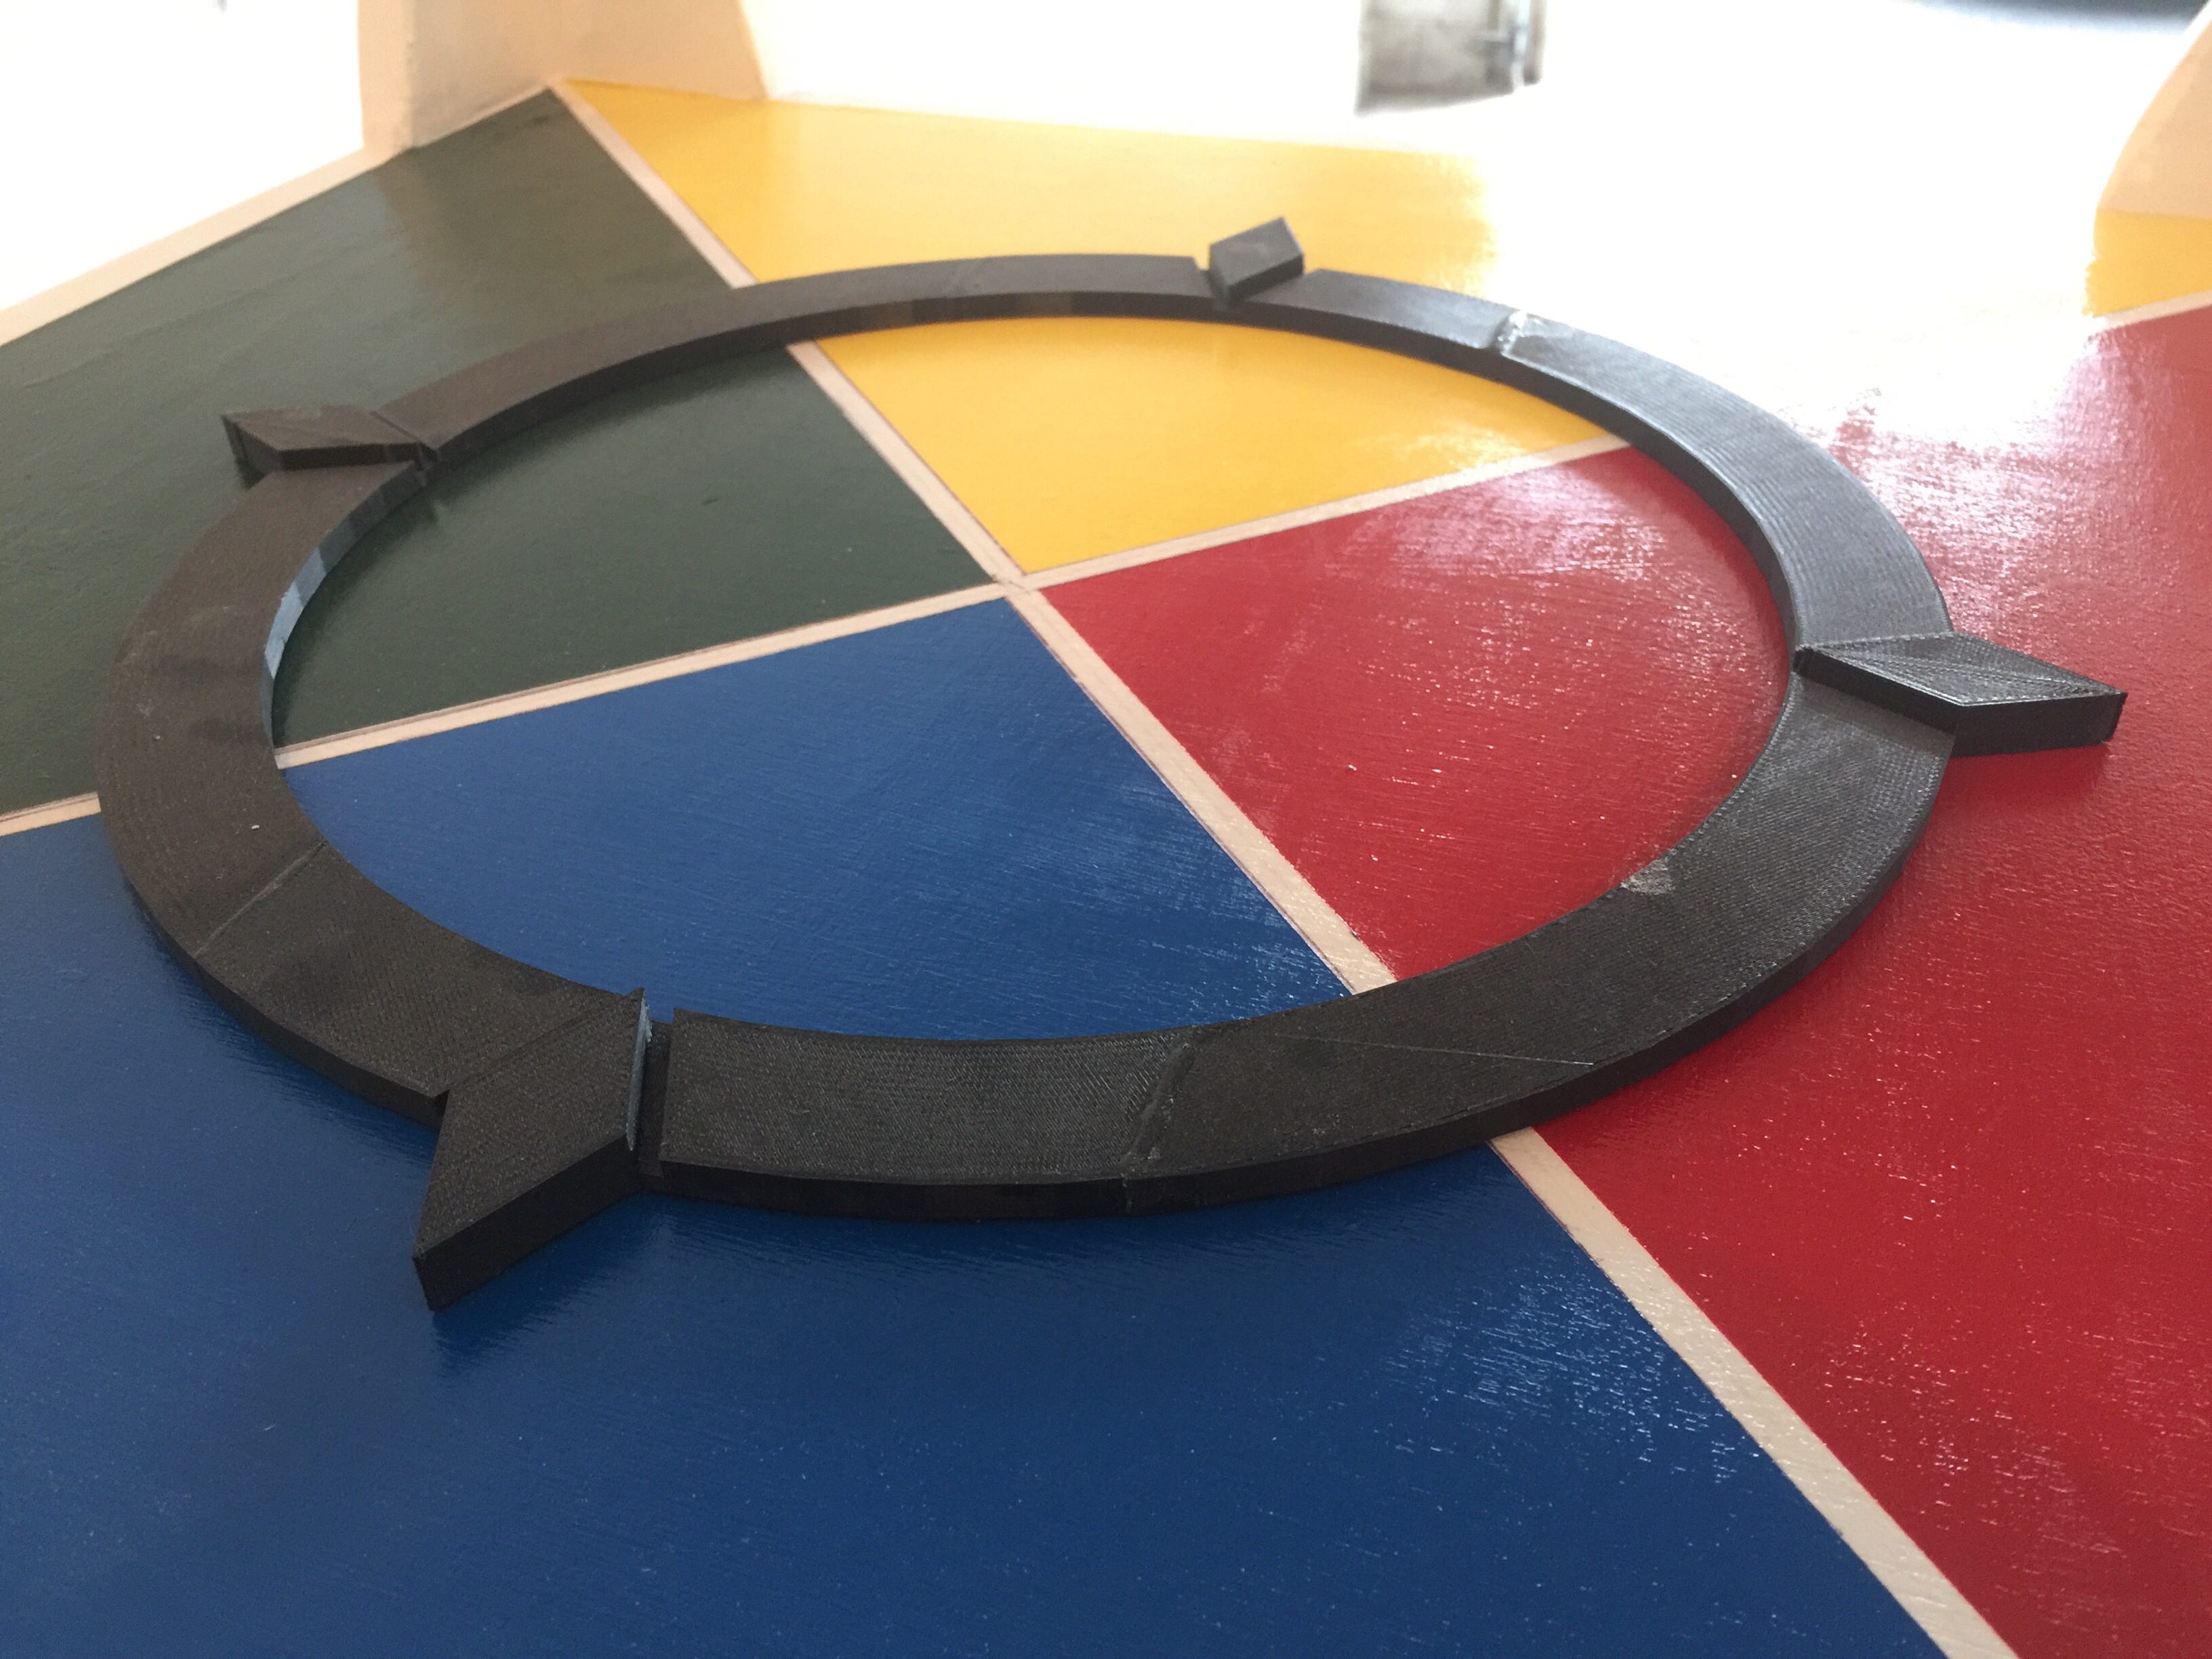
While priming and painting the alchemical symbols, I glued the pieces of the rose together with epoxy and left it overnight for the pieces to fully cure. The sizing of the rose posed a small problem, as you can see. The ring actually covers the vents. I'm actually not all that broken up about that as the vents looked like shit to but this means I have to figure something else out and it'll probably fuck up the paint and require me to have to do some touch ups.
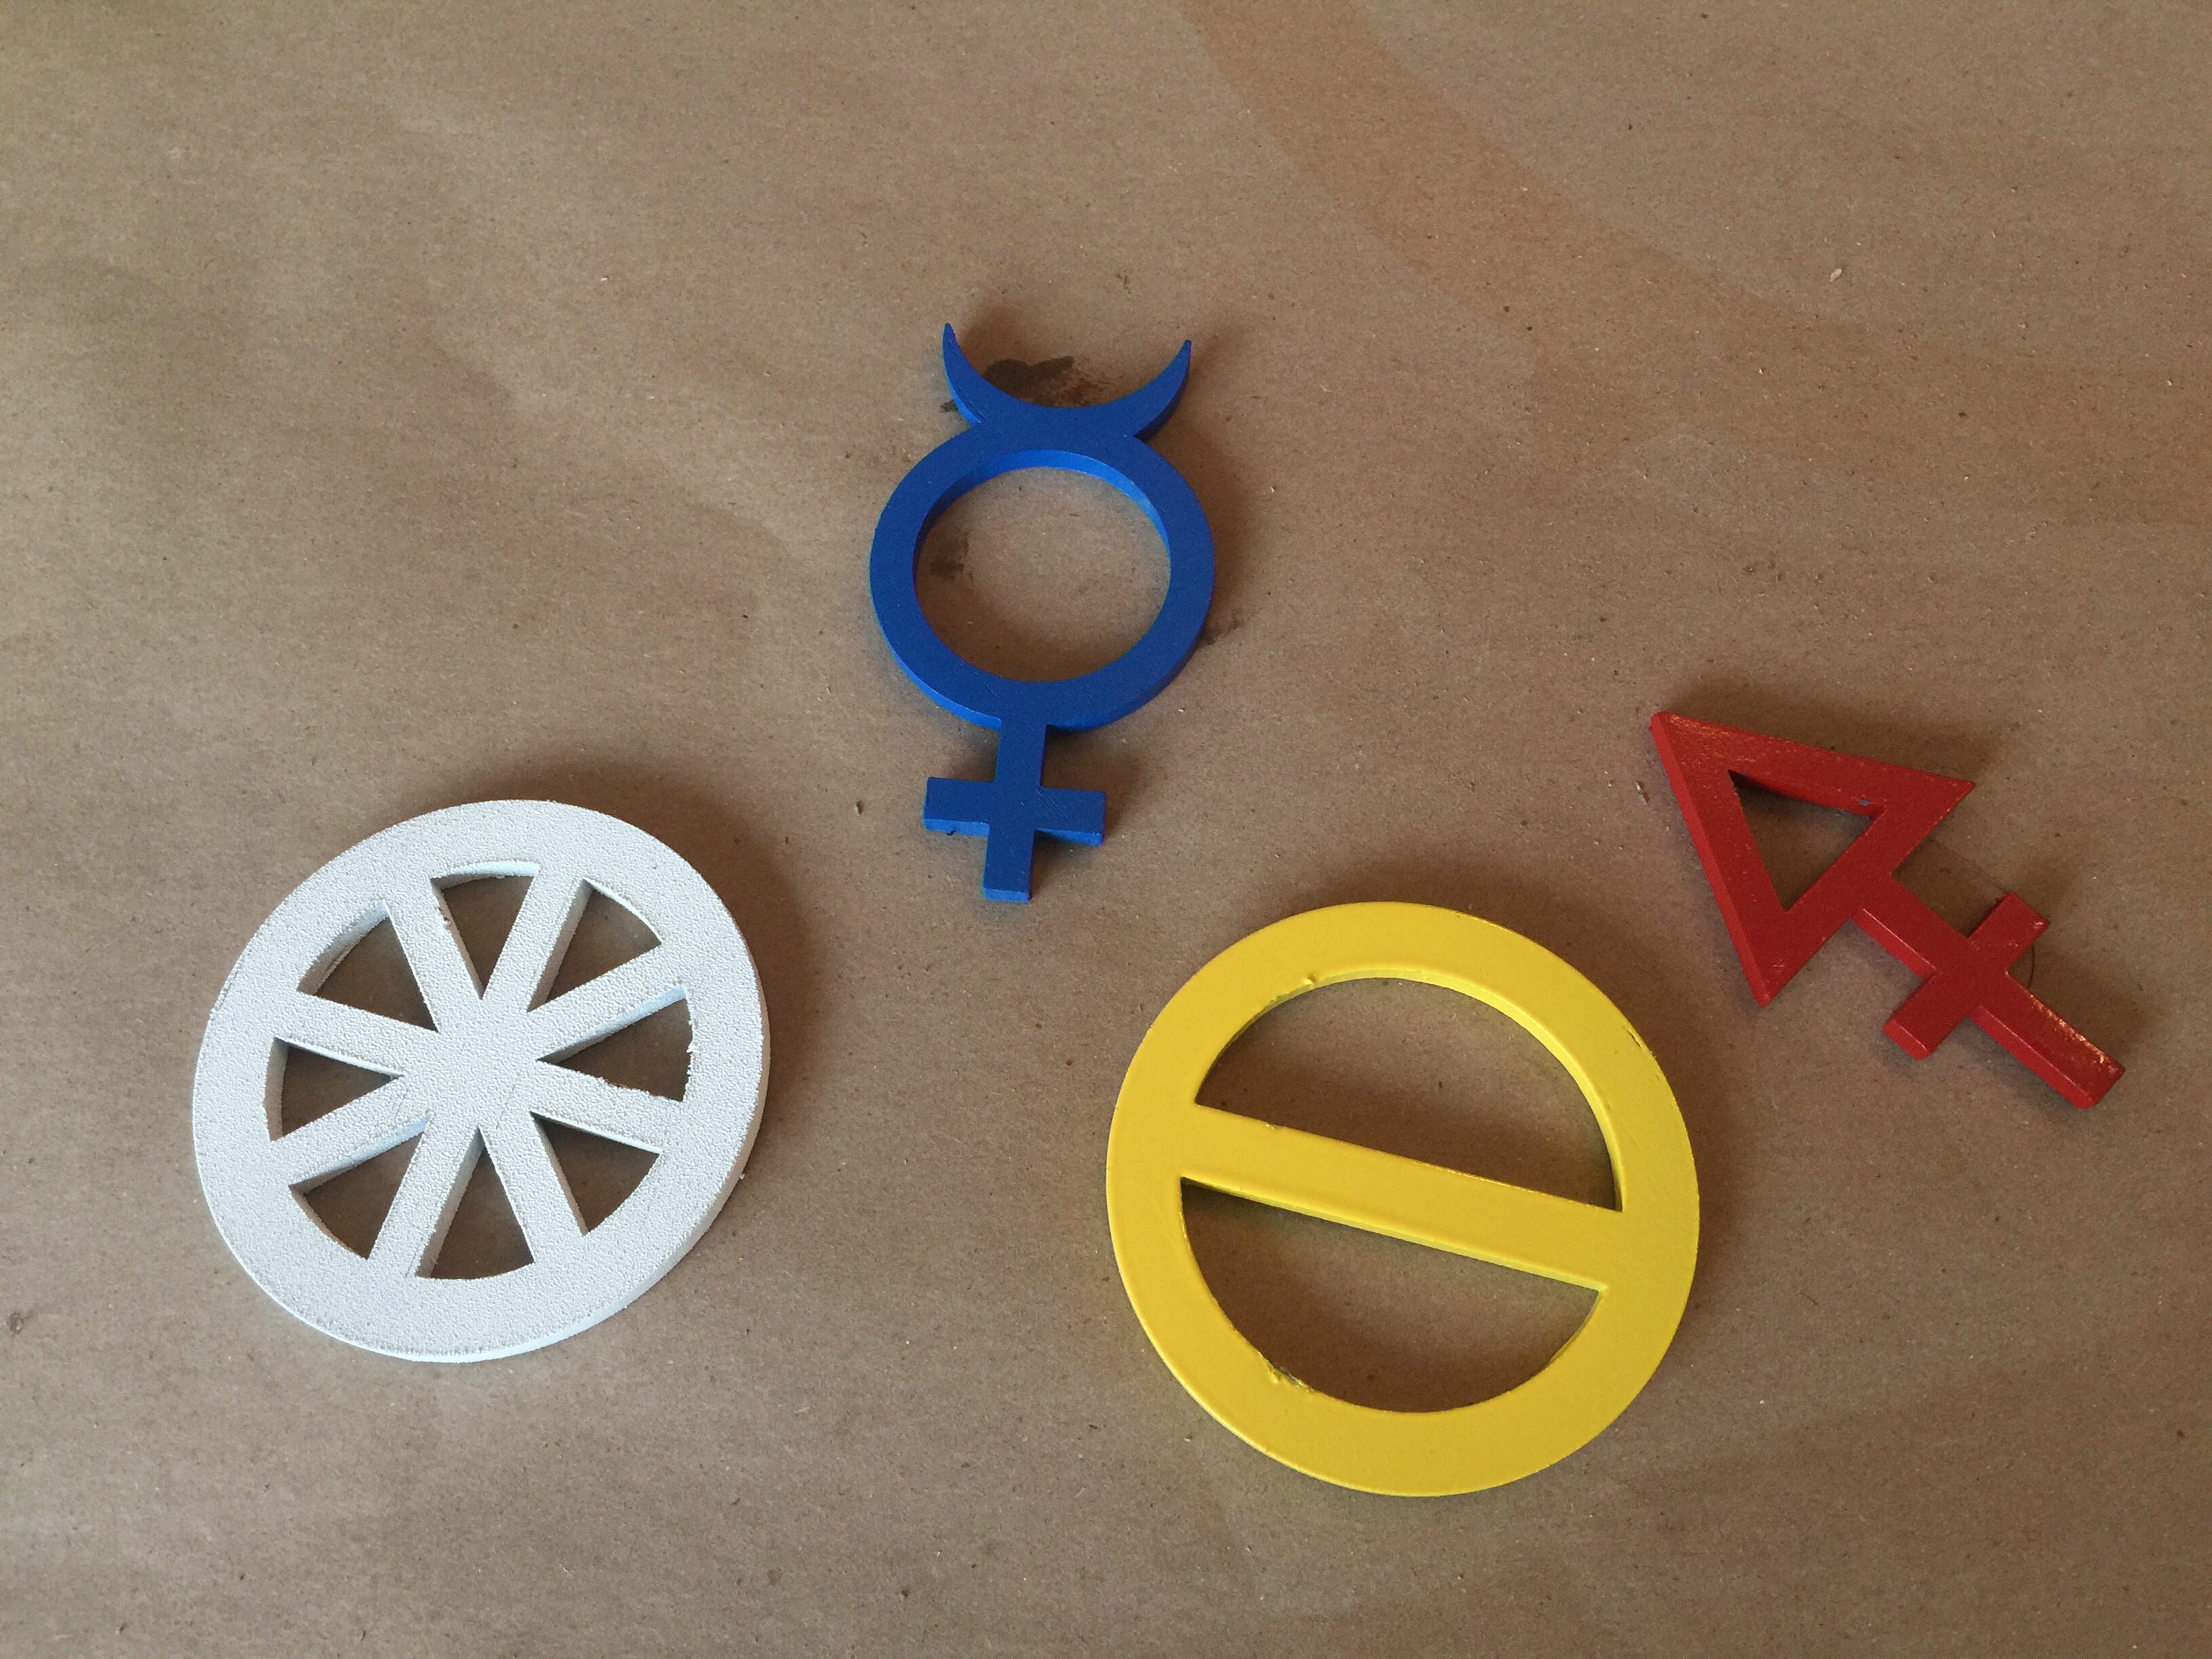
It occurs to me after I've glued the symbols to the altar that I have the symbols for spirit and salt reversed. Salt belongs to the Earth and Spirit, the air. So I pry them loose with my knife, the glue still soft enough, repaint and then make several spirited attempts to glue them to the correct spots, but prying them away pulls up some paint and leaves some epoxy behind and the process becomes a real pain in the ass. It's also unberably hot out and I think that the temperature is making it hard for the glue to properly set. The symbol for salt seems to be actively resisting my attempts to reattach it.
I also drop the compass while sanding it and it breaks into three component pieces which means more epoxy. By this point, even with the garage door open, I've been breathing a steady flow of epoxy and paint fumes and I feel really weird. This, in spite of there being a respirator in the knot of crap that I have piled on the shelf at the back of my garage. I'm starting to feel sick so I walk away and let the glue and paint dry.
I get the idea to grind out the vents with my Dremel in order to extend them to inside the inner perimeter of the compass. It works and the vents are pretty well hidden, but they look like trash to me, even though you can hardly see them. It's enough that I know what they look like under the compass and it's really bothering me. I have a router that I'm considering using in order to neaten up the vents but this prospect terrifies me. I stand to do some real damage to the table top if I'm not careful and having no experience with this device, the likelihood that I fuck this all up and have to start over is pretty high.
I'm at a point now where I'm starting to tire of this process. The build was exhilarating but the process of tying it all up and decorating is easily my least favorite part. It involves tweaks on the fly, an eye for small details, and a steady hand that I don't have. I'm becoming impatient.
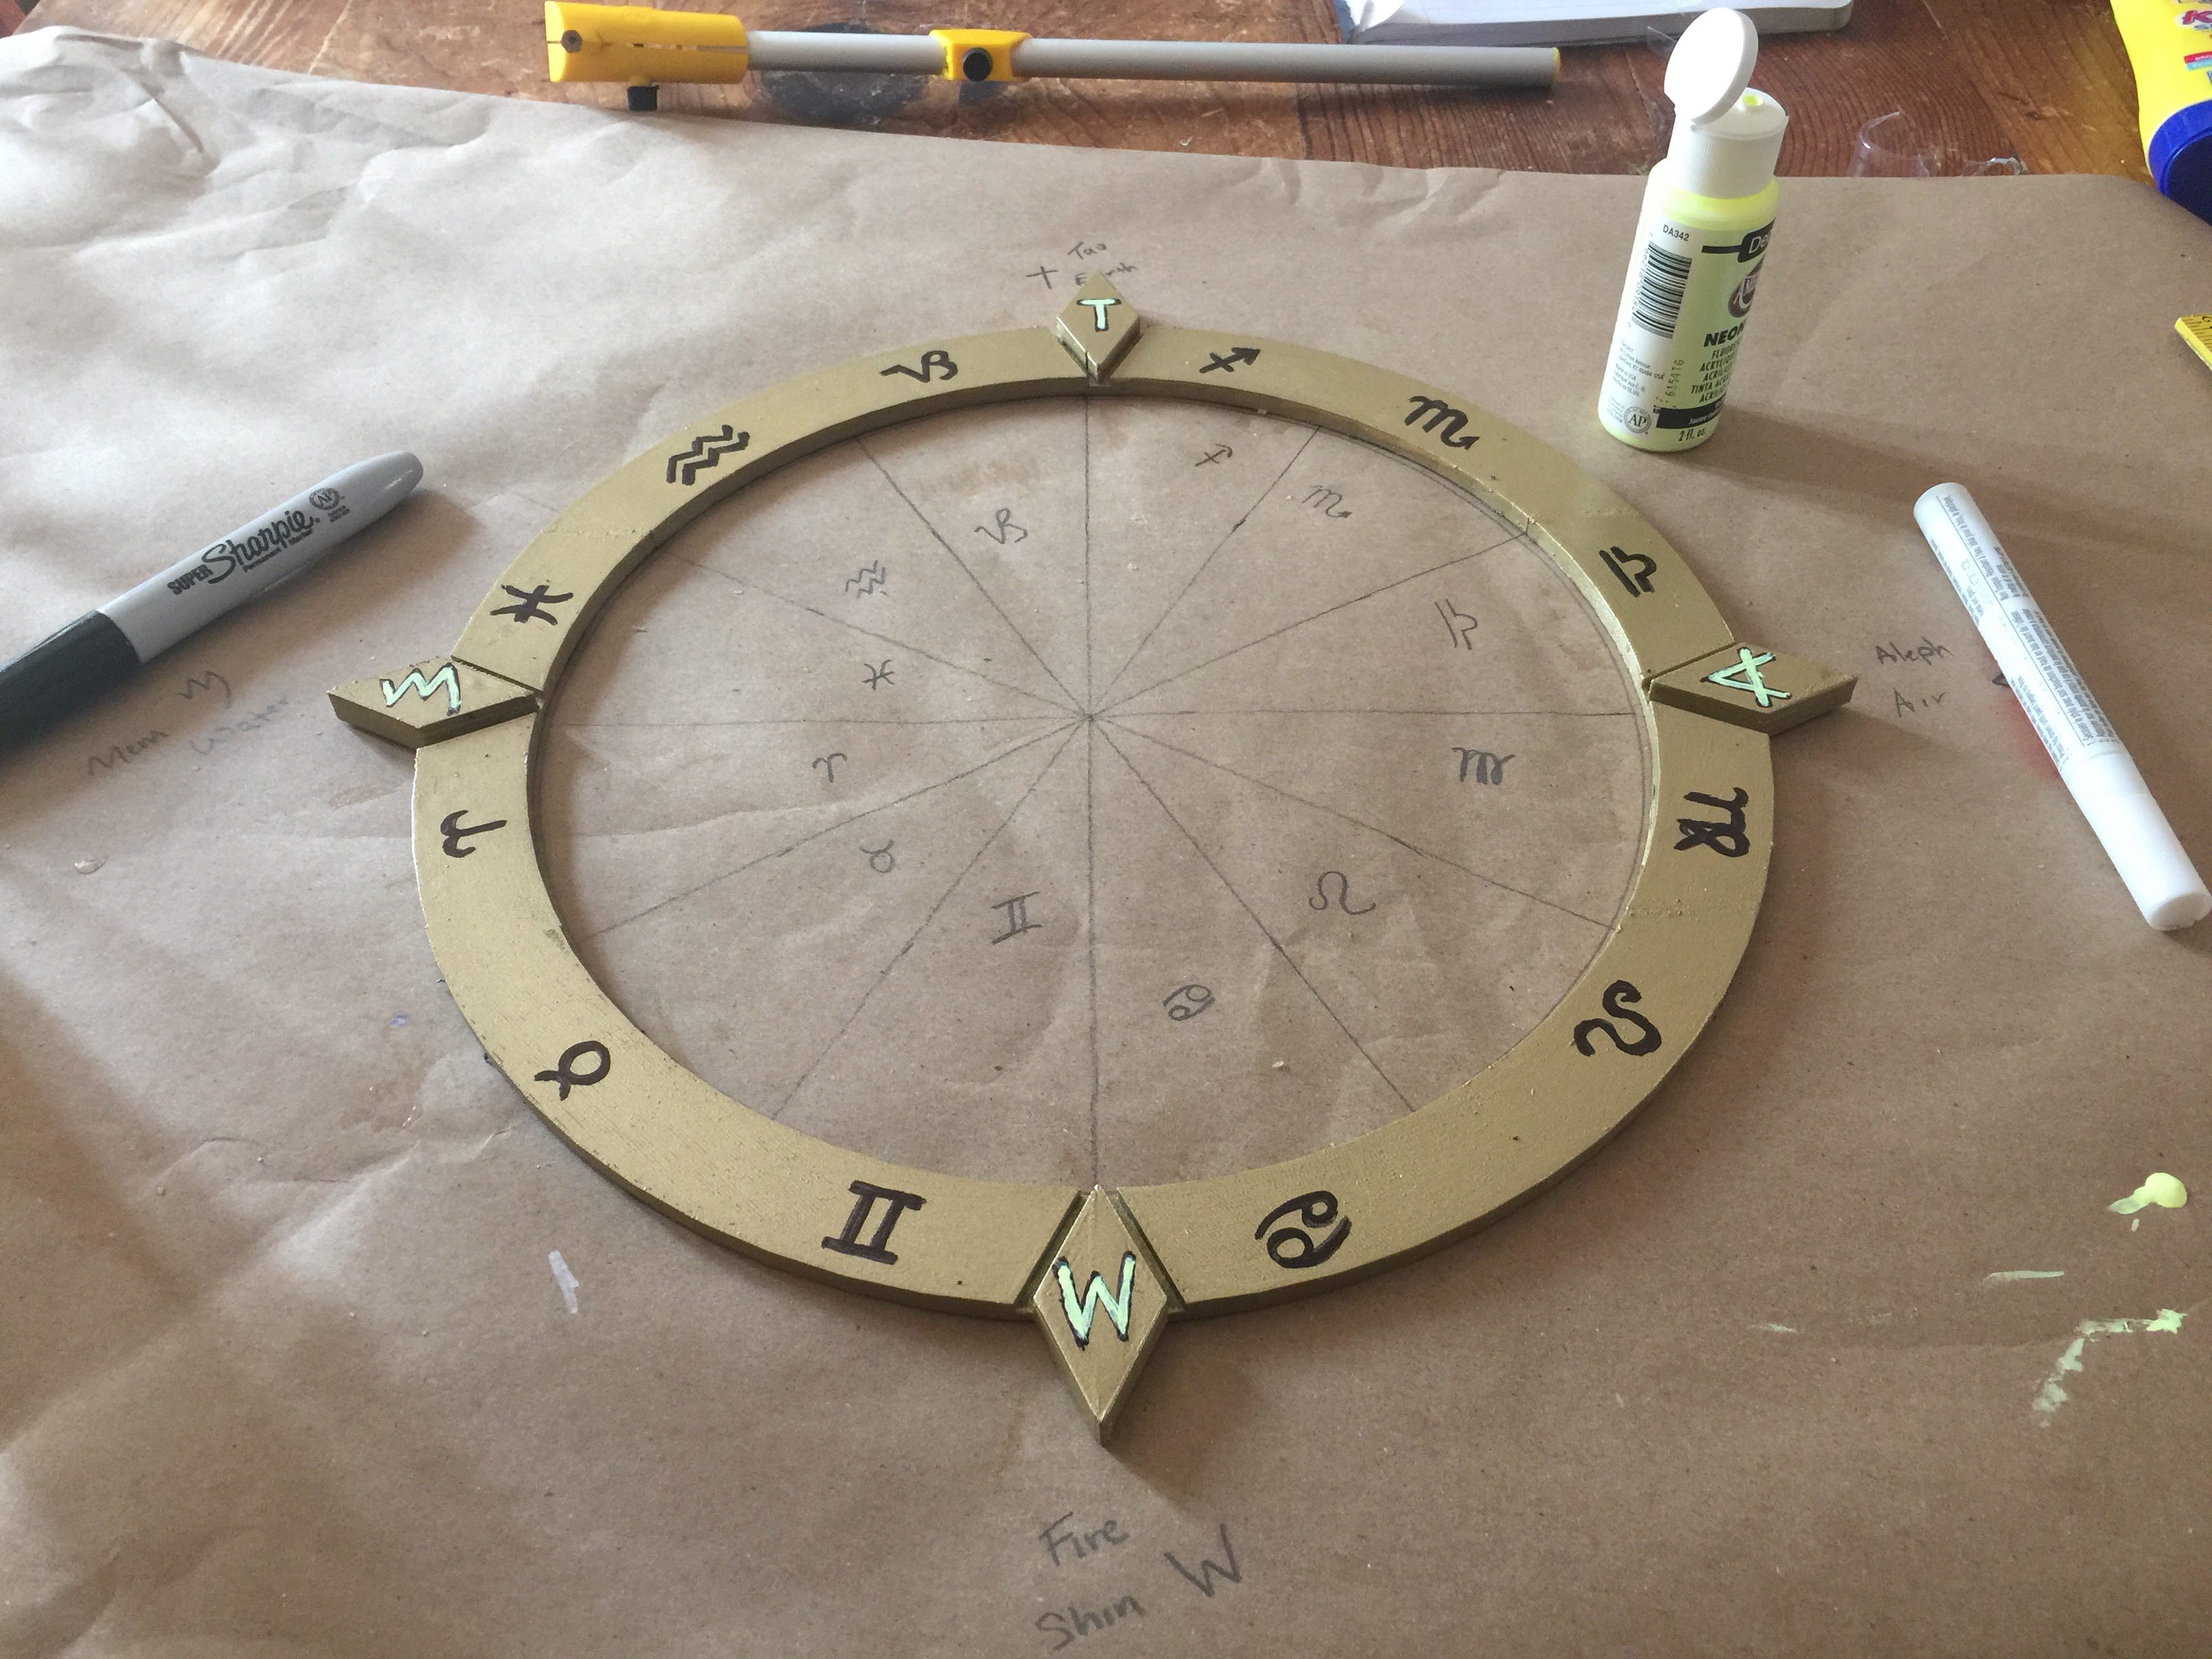
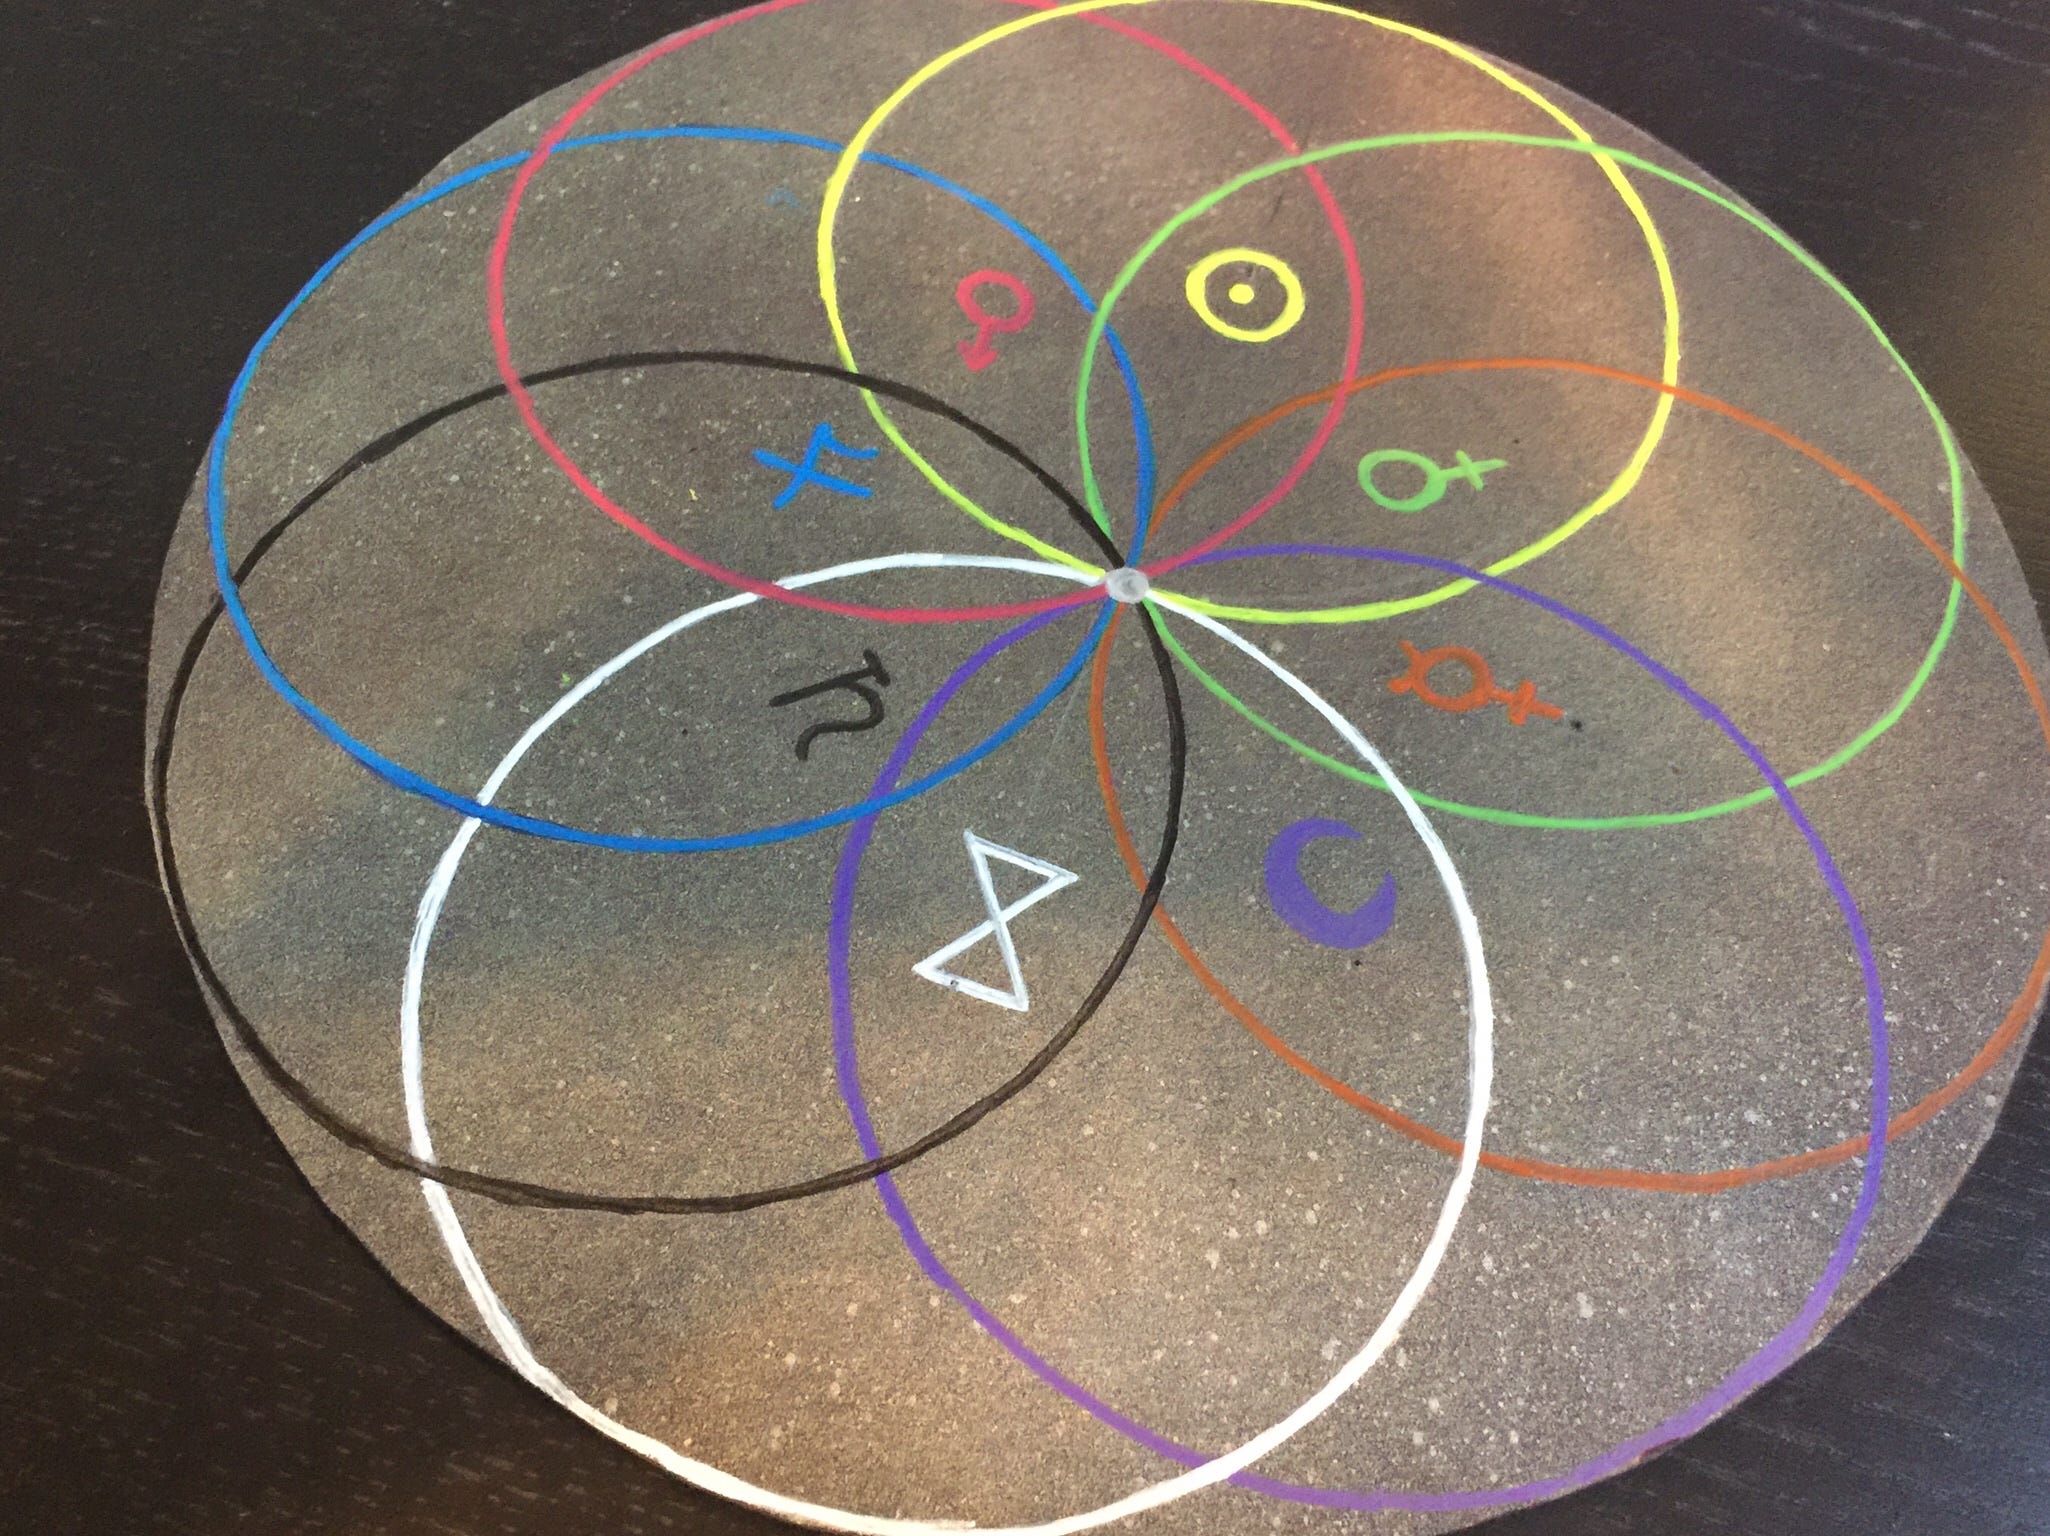
I use a combination of Sharpie, white paint pen and UV reactive paint to decorate the compass. There is a color scale associated with each of the zodiac symbols and my visions of an electric temple with glowing symbols and high frequency energy requires that I have UV reactive paint in colors as close to those of the zodiac scale as I can get them so I put in an order on Amazon and at some point when I'm not looking, my extremely bored and ADHD daughter sits down and does a touch up of her own on the symbols leading me to have to make some corrections and the Phoenician letters no longer look as good as they did on my first pass. I really just want to get this done at this point. I feel like I've been working on it for months.

I also couldn't stand looking at the ground-out vents any longer and sucked it up. I took the router to the grooves and evened them out with a .75" bit. It resulted in some damage to the paint job, which is all my fault. I should have done this before I painted. The grooves look passable now, though. Because I didn't have the beam compass at the time, my circle was more like an oval and the dremel job I did the first time around wasn't helping matters. With the rose in it's place on the table, it covers them for the most part, leaving about a .125" gap between the rose and table surface. It'll vent the smoke just fine. I just need to sand and paint again and we're back in business. I can feel the end coming. The final touch will be The Eneosphere.
Tragedy strikes as, once again, I dropped the compass on the floor and the shock was enough to break it into pieces. I'm starting to feel like I need to take a long break from this. Maybe I should shift over to cutting and piecing together the magic circle. Maybe I should do some touch ups on the compass model and send it out to a place with a larger printer so that it can be printed in a single, unbroken piece of polymer. But I'm certainly not looking forward to having to sand and paint again. Attempts to spot paint the places on the table damaged by the router resulted in mists of paint contaminating the other colors, so now I have to tape the whole thing back up and repaint the quarters.
I don't know.
I'm beginning to channel my boredom and frustration with these final tedious steps into the table and since this is the center of my practice, I'd rather not have that vibe in the mix fucking up the magic. I just wish it was done so I could move on and build out the rest of my pieces.
It's been a few days since my last update. My personal energy last time wasn't ideal for creativity. When you're directing all of your energy toward getting a job and the process moves slowly you tend to find the frustration from that leaking into other parts of your life. With that all sorted out now, I returned to the table and made some more progress. This time, I bought a piece of heavy card. It's like bristol board but I'm not positive. I buy a set if paint pens and measure out the Eneosphere circle on the board. To give the board a bit of contrast, I most it with the same gold paint that I used on the compass. It takes a couple of tries to get it right but after a few days, I have it nailed down in a state that I like. I tested out a can of clear spray coating on the leftover board to see if it'll be adequate for protecting the board when it's actually on the table and there's shit like candle wax and oils dripping all over it and it seems to be fine. I've repaired the breaks in the ring and have repainted a couple of the quarters. The altar will be done this weekend and then I can start to plan the next phase.
Two strings of black light LEDs arrived as well and I've started to clear the space in my basement for the electric temple. I'm guessing that I'll be able to start my exercises for angelic invocation in about a month.
Finally, I touch up the paint and get everything attached. The altar is done.